


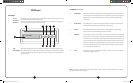


3 4
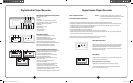
Operation
Battery
Charge the battery for at least 10 hours before the rst use of the PA919SD, PA919, or the PA919PS. Simply plug the
power cord into an AC outlet and charging begins automatically. The charging indicator will ash until fully charged,
then it will stay green. The unit can be used while it is plugged in for charging.
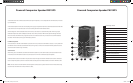
There are two indicators above the main power switch. When the unit is turned on, the one on the left will light “red”
when the battery has a low charge. The one on the right will glow “green” if the battery is fully charged or if operating
on A/C power.
It is recommended that the battery be recharged after several hours of usage, rather than stored with a low battery. This
will prolong battery life. Storing more than 30 days without recharging will deteriorate the battery.
Digital Master Volume Control
When the main power switch is turned on, the Digital Master Volume Control is at the lowest level to prevent accidental
damage to the amplier or internal speakers. The volume can be controlled in two ways; using the “Up” “Down” buttons
on the mixer panel or using the RC-300 infrared remote control. The remote sensor must be used in front of the speaker
as the sensor is behind the speaker grille.
Recommended Set-up Procedure
Ideally the master volume should be at maximum volume before the wireless receiver and microphone volumes
are adjusted to the desired loudness. Since there are always at least two (2) volume controls to contend with, it is
suggested that prior to turning the power on the UHF receiver volume controls be set at “10 o’clock”. Also set the
microphone volume controls at “10 o’clock”. Turn on the main power switch and use either a wireless microphone
or cabled microphone to adjust the master volume.
Digital Audio Player/Recorder & CD Player
The main power switch does not control the Digital Audio Player/Recorder and CD player. A separate power switch is
combined with the MP3/CD volume control to limit battery drain when the Digital Audio Player/Recorder or CD are not
being used.
Wired Microphones
There are two (2) independent combination XLR/1/4” jacks for using microphones with cables. Each jack has a volume
control which eects the loudness of both wired and wireless microphones. Also each has a “Voice/Music” switch. On
“music” program the sound is full delity, while on “voice” the sound is tailored to give maximum projection while limiting
battery drain.
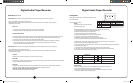
Operation continued
Line In
Insert both RCA plugs into the RCA jacks when using a stereo input. The left and right channels are combined so no
program material is lost. If the source is monaural, either RCA jack can be used. The Line In volume control is used
to increase or decrease the level of the input signal.
Line Out
The two RCA jacks are used to connect to the input of another piece of equipment such as a tape recorder, mixer or
another amplied speaker. The outputs are monaural and volume level will depend on the volume of the source. For
example, the tape or CD player level is controlled by the tape/CD volume control. Lie out is independent of the Master
Volume Control.
Tone Controls
The separate base and treble controls provide a wide range of adjustment for increasing or decreasing either the bass or
treble from “at” frequency response. The center or “12 o’clock” position is at.
Speaker Mute Switch
Engaging this switch will cut o the sound of all speakers, internal and external, except as explained in the section under
“PA919PS operation”.
Voice Priority
This feature is used for voice override of the music program when using a microphone. The “ducking” circuit attenuates
the music when a person speaks into the microphone. After a 3 second delay in the speech, the music returns to the
previous level.
califone_919SD_manual_rev1.indd 6-7 6/22/09 1:22 PM