


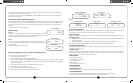

11 12
To stop a playing CD
Press the ‘STOP’ button.
For a CD, the display will show “Total Track Number” and “Total Track Time.”
For a MP3 CD, the display will show “Total Album Number” and “Total Track Number.”
Note: When you press ‘PLAY’ again the player will return to the rst track. The display will show “Track Number” and “Current Track Play-
ing Time.”
To skip forward or backward from track to track during playback
Press the ‘SKIP uu|’ button once and the next track will be displayed and begin playing. Press repeatedly to
move forward to the desired track.
Press the ‘SKIP |tt’ button once to return to the beginning of the current track. Press repeatedly to skip back
to earlier tracks. Playback resumes from the selected track.
Repeat CD Selections
Repeat one or all programmed selections using the ‘REPEAT’ button. Push the button once to replay any
single selection. Push the button twice to replay all programmed selections (in programmed order). Push
the button three times to clear the ‘REPEAT’ function. “REPEAT ONE” or “REPEAT ALL” will appear on the
display when the ‘REPEAT’ button is pushed.
When playing a MP3 disc, press ‘REPEAT’ --> ‘REPEAT ALBUM’ --> ‘REPEAT ALL’ --> normal playback.
AM/FM Radio Operation
The 2455AV-03 features a AM/FM PLL (phase locked loop) stereo radio and telescopic antenna for local AM
and FM stereo reception. To operate the radio:
1. Plug the unit in.
2. Set the ‘FUNCTION’ selector to Radio.
3. Extend the telescope antenna.
4. Select AM, FM or FM Stereo reception band.
5. Use the Tuning buttons to select the desired station.
6. Adjust antenna for best reception.
Note: The FM “stereo” indicator light will appear on the LED display when an FM stereo station is tuned in.
Care and Handling of Compact Discs
1. Handle the disc by its edges or center hole. To keep the disc clean, avoid touching the data surface.
2. Data is embedded directly beneath the label, protected only by a thin lacquer layer and is more vulnerable to damage than
the bottom. A scratch that penetrates the label will certainly destroy data, whereas a scratch on the bottom can often be
overlooked or corrected by the laser pickup.
3. Do not write on the label surface. A ballpoint will damage data; marking pens have solvents that may penetrate the top layer.
4. Do not stick paper or tape on the label surface; this probably won’t hurt the disc but might jam the disc drive.
5. Do not expose a disc to high temperature or humidity for an extended period of time. The disc material will soften at around
200 degrees Fahrenheit. Allow the disc to reach room temperature before playing if it has been subjected to extreme cold.
6. Preventive cleaning is unnecessary and potentially harmful. Clean only when required.
7. Clean a disc with a soft moistened cloth. Pat dry. Wipe the disc from the center out like spokes of a
wheel. Never wipe across a disc as you would an LP record.
8. Never use solvents, commercial cleaners or sprays designed for LP’s. Plain lukewarm water is recommended.
9. Keep discs protected at all times.
Cassette Maintenance & Service Cleaning
The heads, capstan and pinch roller should be cleaned from time to time to prevent buildup of tape oxide,
which degrades performance.
1. Remove cassette tape before cleaning.
2. Clean the head of all visible, reddish-brown oxide with a cotton-tipped swab moistened with a methyl alcohol or any
solution specically manufactured for this purpose.
Caution: DO NOT scrape the head surface with hard, sharp or abrasive objects. This will permanently damage the heads.
3. Clean the pinch roller by scrubbing the surface of the roller with the moistened swab. Rotate the roller
by hand until the entire surface is clean.
4. Clean external case surfaces with a moist, soft cloth. Use only a mild detergent water solution.
Head Demagnetization
It is recommended that the tape heads be demagnetized from time to time. This eliminates residual
magnetism which degrades sound reproduction and the recording function.
1. After cleaning the heads and capstan, place the demagnetizer several feet away from the cassette unit
and plug it into an AC outlet.
2. Follow the manufacturer’s operating instructions supplied with the demagnetizer.
Project Intercept
Please contact us immediately if you experience any diculties with your Califone product. Our Project Intercept customer service
program will repair or replace warranted items. Contact us via phone 1-800-722-0500 or email warranty@califone.com.
2455AV-03 User Manual - CK 2010.03.22.indd 14-15 3/22/2010 9:55:24 AM