


5
DV352
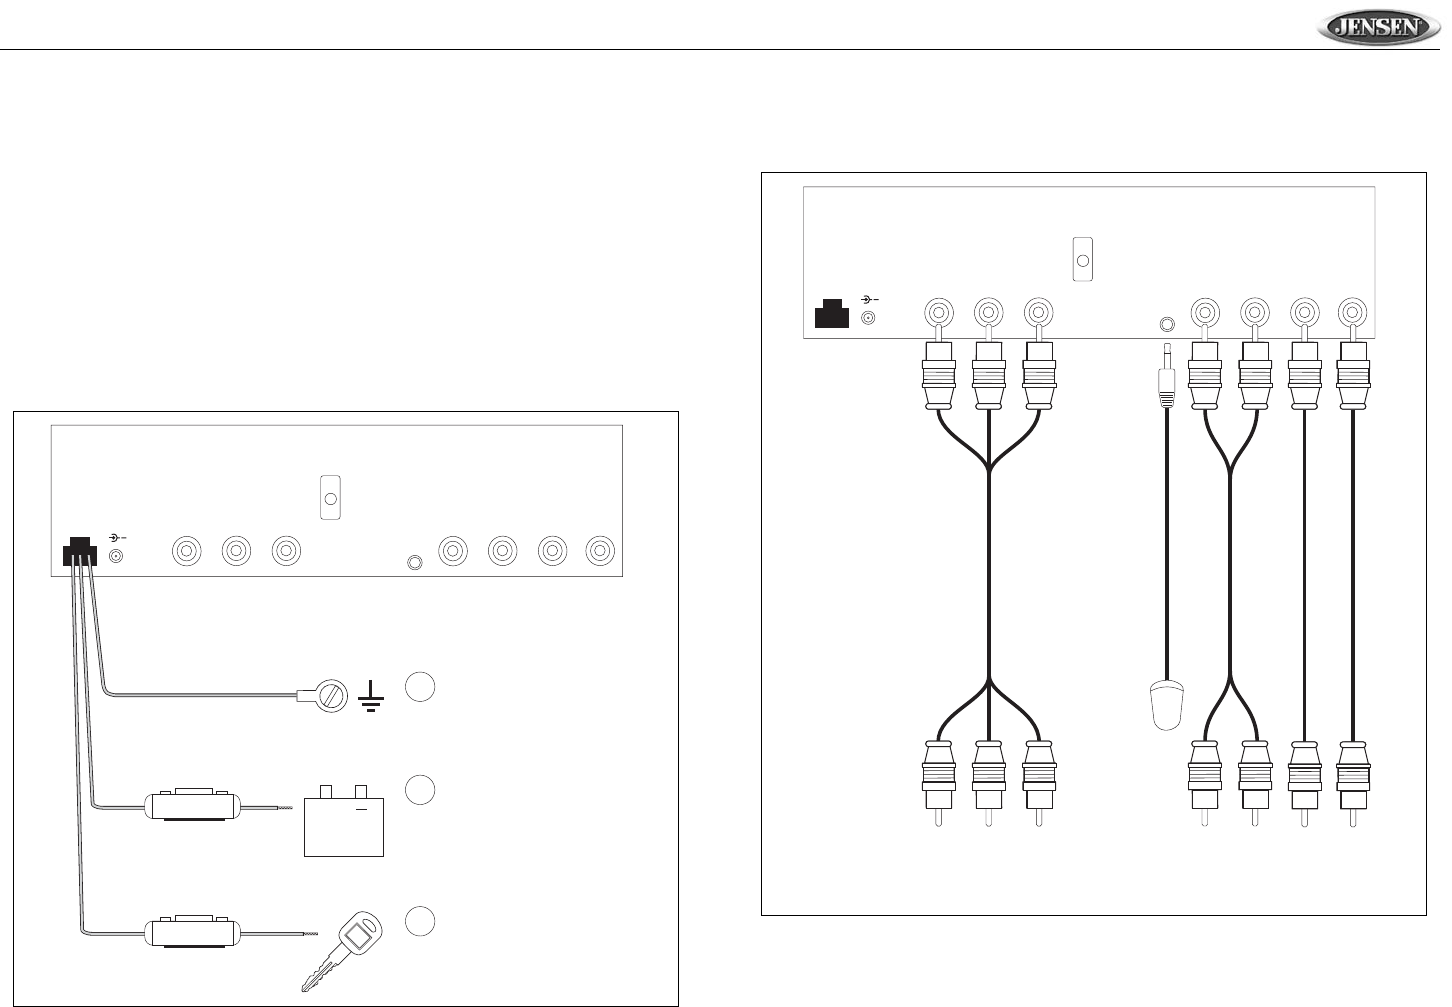
Wiring
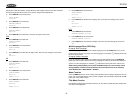
Power Connections
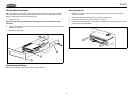
1. GROUND WIRE (black) – Securely fasten the Ground wire to a grounded metal part of the
car’s chassis. If you cannot find an existing bolt or screw to fasten it to, drill a hole in the metal
and secure it with a screw. To ensure a good ground, remove any paint or grease from areas
where the wire will contact the surface.
2. CONSTANT POWER WIRE (yellow) – Connect the 12V PLUS constant power wire to a live
12 volt wire in the vehicle. Before making a connection, check that the wire you intend to
connect it to is always live, even when the car’s ignition is turned off. If a live wire is not found,
route the wire to the car’s fuse block and connect it to a live circuit there.
3. ACC POWER WIRE (red) – Connect to a +12 volt circuit that is only live when the ignition is
on. The best connection point is at the car’s fuse block at the “RADIO” or “ACCESSORY”
identified terminals.
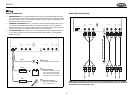
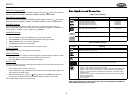
Audio/Video Connections
NOTE: When replacing a fuse, be sure to use correct type and amperage to avoid damaging
the DVD player. The DV352 uses one 3 amp and one 0.5 amp ACG fuse, located in the black
filter boxes in-line with the power wires.
VIDEO 1
AUDIO INPUT 1
LR
DC12VIN DC12VOUT
+
INPUT
AUDIO OUT
LR
VIDEO
OUT1
VIDEO
OUT2
REMOTE
+
Black
Yellow
Red
3A
0.5A
Ground
Connect to ground terminal.
Memory/Battery
Connect to battery or 12 volt
power source that is always
live. The radio will not work
if this wire is not connected.
Accessory/Ignition
Connect to existing radio
wire or radio fuse.
1
2
3
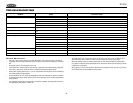
VIDEO 1
AUDIO INPUT 1
LR
DC12VIN DC12VOUT
+
INPUT
AUDIO OUT
LR
VIDEO
OUT1
VIDEO
OUT2
REMOTE
REMOTE CONTROL RECEIVER
YELLOW
WHITE
RED
WHITE
RED
YELLOW
YELLOW