


13
ote on power handling
h 6-series speaker system requires a minimum of 20 Watts per channel to achieve reasonable lis-
ng volumes in a moving automobile without clipping the amplifier. a/d/s/ recommends 150 Watts
channel as a maximum so as not to exceed the thermal or mechanical limitations of the speaker sys-
. Any amplifier between 20 watts and 100 watts per channel may be used. If you choose to use
amplifier with more power than 100 Watts be very careful, you can damage the speaker system if
ed too loud.
a/d/s/ loudspeakers will produce reasonable volume levels in the automotive environment using mod-
e amplifier power. However, the use of a low powered amplifier to try and attain very high volume
ls can lead to overdriving the amplifier. This will generate high distortion levels which can easily
mage loudspeakers, even when the amplifier’s rated power is far below the maximum rated power
he loudspeaker.
rule, do not turn the volume up above the point where you hear distortion on musical peaks from
er an overdriven amplifier or mechanical noise from an overstressed speaker. For the best perfor-
nce and reliability, select an amplifier with slightly more than the maximum power you are likely to
d to generate the desired volume levels. This margin of reserve power will ensure that the amplifi-
will not attempt to deliver more than its design allows.
ning: Excessive sound pressure level can permanently damage your hearing. The maximum vol-
e levels attainable with a/d/s/ speakers, combined with high-power amplification, may exceed safe
ls for extended listening. When listening at high volume levels always use hearing protection or
it down!
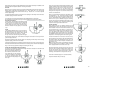
mounting locations
e are many possible choices of mounting locations. The automobile factory locations will usually
ate the woofer mounting position. Because of its small size and multiple mounting options, the
eter can virtually go anywhere. a/d/s/ uses an unusually low crossover frequency for the tweeter
ch means you are not restricted to mounting the tweeter close to the midrange. The tweeter can
mounted as far as 6" from the midrange without causing adverse effects on the sound quality.
s/ can not recommend specific locations for the tweeter for each car, but we can give some gener-
ps. Try to keep the tweeters as far to the sides of the car as practical, avoid placing them above ear
l unless the woofers are also above ear level. Place the tweeters in similar locations on both sides.
a few locations by just placing the tweeter or taping it in a location and listening to ensure the
ed stereo image and high frequency dispersion are achieved before committing to a location by
ng holes in the automobile.
ontrols and connections
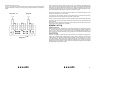
eter level control
three position switch in the crossover box labeled low mid high adjusts the relative volume of the
eter with respect to the midrange. The mid position is referenced as equal output from the
range and tweeter. The hi position offers 3dB more output from the tweeter. The low position is
less output. Adjust this control to your listening preference.
s y m p t o m p robable cause re m e d y
no output s o u rce or amplifier not turned on check source or amplifier and fix
a s n e e d e d
audio input not connected or no check RCA connections and signal
output from sourc e i n t e g r i t y , fix or replace as needed
p rotection circuit activated t u rn down volume. Pro t e c t i o n
will self re s e t
speaker wires not connected check speaker wires and fix or
replace as needed
audio cycles on and off speaker damaged check system with known working
speaker and fix or replace as needed
t h e rmal protection engaged check that amplifier has adequate
ventilation, check speaker imped-
ance load
Loose or poor audio input check RCA, power and speaker
connections and fix or replace as
n e e d e d
d i s t o rted output p reamp volume set too high,. check volume of preamp and
exceeding maximum input adjust appro p r i a t e l y.
capability of amplifer
Impedance load to amplifier check speaker impedance load, if
too low 1 ohm re w i re the speakers to
achieve a higher impedance
s h o rted speaker wire s check speaker wire connections
and repair or replace as needed
speaker not connected pro p e r l y check speaker wiring and fix or
replace as needed, refer to the
speaker wiring section of this
manual for detailed instru c t i o n s
speaker damaged check system with known working
speaker and fix or replace as needed
poor bass re s p o n s e speakers wired with wrong polarity check speaker polarity and fix as
causing cancellation at low fre q u e n c i e s n e e d e d
lack of stereo separation speakers wired with wrong polarity. check speaker polarity and fix as
n e e d e d
s t e reo / bridge switch set to bridge set switch to stereo position
p o s i t i o n
speaker connected across wrong check that the speaker wires are
output term i n a l s not connected to the bridged term i
nals and fix as needed
s o u rce set to mono check source and adjust controls
as needed