


16
TASCAM DR-22WL
4 – Recording
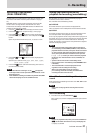
Selecting a folder to store files
Recorded files will be saved in the current folder. If no setting is
made, they will be saved in the MUSIC folder. To change to the
folder that you want, follow the instructions in “5 – Using files
and folders (browse screen)” on page 25 to designate it.
When an SD card is initialized, the MUSIC folder will be set as the
current folder.
Recording format settings
(FORMAT/SAMPLE/TYPE)
Select the desired audio file type before you start recording.
1. Press the /MENU/8 button to display the menu screen.
2. Press the F1 button to open the REC menu page.
FORMAT setting
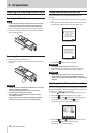
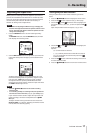
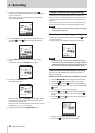
3. Use the F2 and F3 buttons to select (highlight) the
FORMAT item and press the F4 button.
Open the parameter list for the FORMAT item.
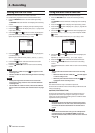
4. Use the F2 and F3 buttons to select (highlight) the
file type.
Options: BWF 16bit, BWF 24bit, WAV 16bit
(default value), WAV 24bit, MP3 32k, MP3
64k, MP3 96k, MP3 128k, MP3 192k,
MP3 256k, MP3 320k
NOTE
•
BWF is a format for broadcasting that has the same sound
quality as the standard WAV format. It also uses the same
“.wav” file extension as WAV files. In this manual, we
distinguish these file types by using the terms BWF and WAV.
•
The WAV format offers higher quality recording than MP3
files;
•
On the other hand, the MP3 format can record for longer
hours.
•
With MP3 format, recording with higher values offers better
quality.
•
Cue marks in WAV file that supports BWF (Broadcast
Wave Format) can be used in BWF compatible devices and
computer softwares.
5. Press the F4 button to finalize the setting and return to
the item selection mode.
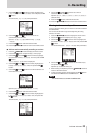
SAMPLE setting
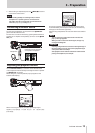
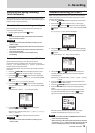
6. Use the F2 and F3 buttons to select (highlight) the
SAMPLE item and press the F4 button.
Open the parameter list for the SAMPLE item.
7. Use the F2 and F3 buttons to select (highlight) the
sampling rate.
Options: 44.1k (default value), 48k, 96k
NOTE
96k cannot be selected for a MP3 format file.
TIPS
Selecting the WAV 16bit and 44.1kHz will allow you to
record in CD-quality.
8. Press the F4 button to finalize the setting and return to
the item selection mode.
TYPE setting
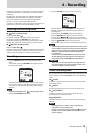
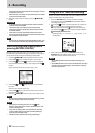
9. Use the F2 and F3 buttons to select (highlight) the
TYPE item and press the F4 button.
Open the parameter list for the TYPE item.
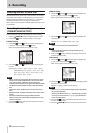
10. Use the F2 and F3 buttons to select (highlight) either
the stereo file or mono file.
Options: STEREO (default value), MONO
NOTE
•
When MONO is selected, left and right channel signals will
be recorded separately .
•
Selecting the WAV format MONO will extend the recording
hours by two times than the STEREO type, allowing for
longer recording hours.
11. Press the F4 button to finalize the setting and return to
the item selection mode.
12. Press the /MENU/8 button to return to the home screen.