Turning on/o
Make sure the MP3 player is fully charged before
turning it on.
● To turn on the player, make sure the [POWER] switch
is in the “ON” position . If it is already in the “ON”
position, then press and HOLD the [ ] button
until the display lights up.
● To turn o the player, press and HOLD the [ ]
button until the display shuts o or slide the
[POWER] switch to the “OFF” position.
To navigate the main menu
[ ] move the selection left to the previous option
[ ] move the selection right to the next option
[ M ] conrm the selection
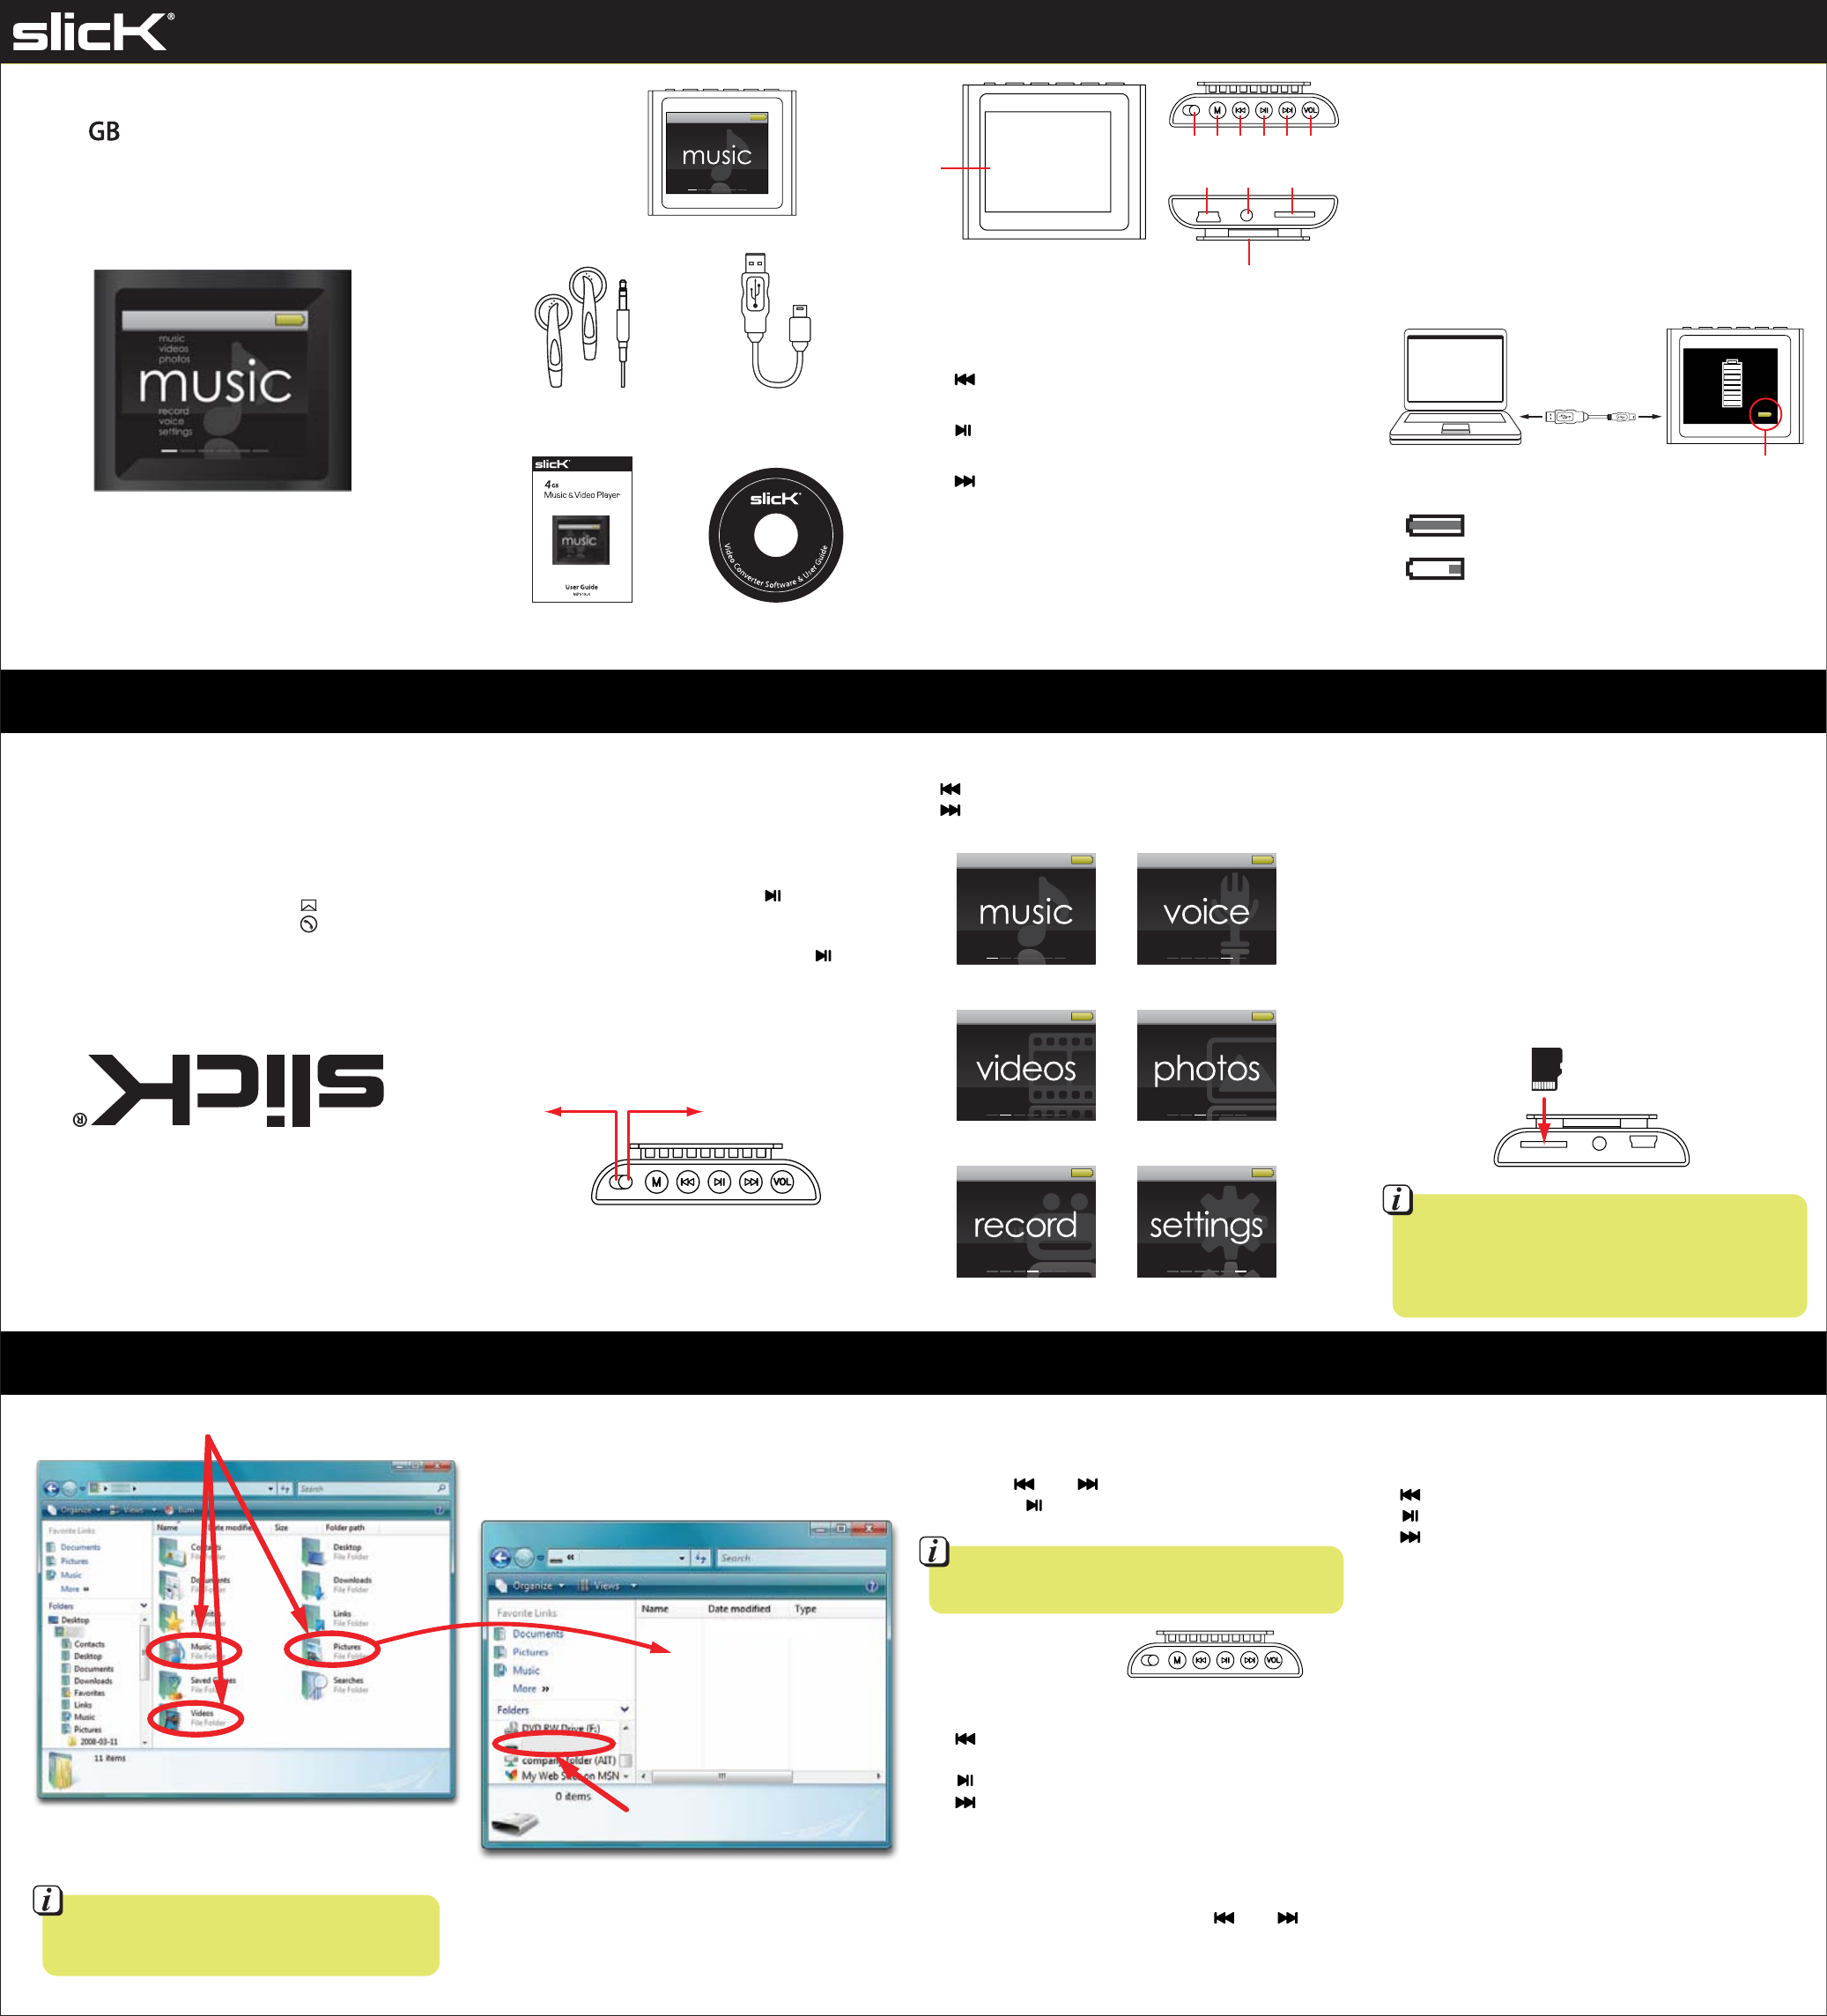
In the box
Basic operation Main menu Micro SD card
Location of controls Charging
Manufactured by Southern Telecom Inc. Brooklyn, NY 11232
Slick is a registered trademark of Southern Telecom Inc. Brooklyn, NY USA
© 2011 Southern Telecom Inc. All rights reserved.
Customer Support:
1-877-768-8483 (Toll Free)
cs@southerntelecom.com
MP518-4
4
Music & Video Player
User Guide
Transferring media les to the player Music
MP3 (G:)
MP3
Drag or copy
les here
(do not drag the les
into the “RECORD” folder)
1. Find music, picture, or video les on your computer. 2. Connect the MP3 Player to your computer, and
locate “MP3.”
3. Drag or copy the les as shown below (do not drag
or copy les into the “RECORD” folder).
Locate “MP3”
NOTE: Screenshots above may be slightly dierent than
your computer’s operating system.
IMPORTANT: Do not disconnect the MP3 Player from the
PC while transferring les as doing so will damage the MP3
Player and your les.
When you are done, disconnect your MP3 Player from
the computer using the “Safe Device Removal” utility
in the taskbar.
1. To play music, select “music” from the main menu and
press the [M] button to conrm. The music playback
screen will be displayed.
2. Use the [ ] or [ ] button to select a track then
press the [ ] button to start playing the selected
track.
Music controls
(playback screen)
1. [ M ] access music menus 1 and 2 / press and HOLD for
main menu / conrm volume level
2. [ ] previous track / rewind (press and HOLD) /
decrease volume
3. [ ] play music / pause music
4. [ ] next track / fast forward (press and HOLD) /
increase volume
5. [VOL] open the volume menu
Volume
To adjust the music volume, press the [ VOL ] button to
open the volume menu, then use the [ ] or [ ]
buttons to adjust the volume, then press the [ M ] button
to conrm the level and return to the music playback
screen.
1. Slide the [POWER] switch to the ON position.
Note: The player will not charge while the [POWER]
switch is in the power OFF position.
2. Connect the player to your computer using the
included USB cable.
3. Charge the battery between 3-5 hours. Do not
charge for more than 8 hours.
4. The battery icon in the lower right corner of the
charging screen is the charging indicator. It will
move while charging and remain solid green
when nished charging.
IMPORTANT: Charge the player for at least 8 hours
before using it for the rst time.
Headphones USB Cable
User Guide CD
[POWER] switch
ON OFF
Player
1
32 4 5 6 7
98 10
11
LCD screen
Power on/o switch
[ M ] button: Select / Open menus / Previous menu /
Main menu (press and HOLD)
[ ] button: Previous le / Rewind (press and HOLD) /
Volume down
[ ] button: Play / Pause / Power on/o
(press and HOLD)
[ ] button: Next le / Fast Forward (press and HOLD) /
Volume up
[ VOL ] button: Open volume menu (while playing media)
Mini USB port
Headphone jack
MicroSD card slot
Clip
1.
2.
3.
4.
5.
6.
7.
8.
9.
10.
11.
Charging Indicator
- indicates that the battery is full.
- indicates low battery; the player should be
charged as soon as possible.
Battery level indication:
Charging...
play songs and
voice memos
play videos
record voice memos
play voice memos
view pictures
change system settings
It is also possible to delete les on the player while
connected to the computer. Select the le and
press the delete key of the computer’s keyboard.
• Do not use force while inserting or removing
the Micro SD card.
• Do not remove the card during le transfers.
• Make sure the player is turned off before inserting
or taking out the card.
To browse music les on the player, refer to “music
menu 2” – then search in Local folder (player) or
Card folder (Micro SD card).
Micro SD
Music controls
(menu 1 and menu 2)
[ M ] conrm selection / press and HOLD for main menu
[ ] moves the selection up
[ ] return to music playback screen
[ ] moves the selection down
Music menu 1
1. While music is PLAYING, press the [ M ] button to
access music menu 1 where you can select from the
following options:
Repeat – track repeat options
Equalizer – select music type
SRS WOW – adjust sound eld
Replay mode – track loop options
Exit – exit to music playback screen
2. Press the [ M ] button to conrm your choice.
Music menu 2
1. While music is PAUSED, press the [ M ] button to access
music menu 2 where you can select from the following
options:
Local folder – browse music les on the player
Card folder - browse music les on the Micro SD Card
Delete le – delete a single music le
Delete all – delete all music les
Exit – exit to music playback mode
2. Press the [ M ] button to conrm your choice.
The player supports Micro SD cards (not included), which
allow you to add up to 8GB of additional memory to the
player.
To insert the Micro SD card:
1. Insert the Micro SD card into the card slot with the
metal contacts facing up towards the front of the player,
and gently push it in until it clicks. Do not apply excessive
force, as this may damage the player and Micro SD card.
2. To remove the Micro SD card, gently push it in until it
pops out.


