2. Transferring files
•Transfer files to or from the internal flash memory using Windows Explorer or
Windows Media Player 10*.
• For details on file transfer, refer to Transferring Audio Files to your Player
in the user manual (page 20).
3. Disconneting the player
• After the files have been transferred, unplug the player from your
computer using the “Safely remove hardware” icon in the Notification Area
(next to the clock).
4. Installing the battery & earphone
• Inserting 1 AAA battery into the battery compartment.
• Connect the earphone to the earphone socket.
Learn more about the player
• Read the user manual in the player for more information on the
player’s features, safety and warranty information, and answers to
Frequently Asked Questions (FAQ).
Need more help?
•Visit www.rcaaudiovideo.com/downloads for the latest firmware, user
manual, driver downloads and FAQ.
Press M to enter the Menu
Select Navigation and press M to enter
the navigation mode
Slide to or to select a file or folder
and press to play the music or enter
the folder
Select the back icon at the first row in
the navigation menu and press M to go
back to an upper level
Refer to page 21 of the user manual
Tocom: 5646 9510 (EN/E)
General controls
Thomson Inc.
P.O. Box 1976
Indianapolis, IN 46206-1976
© 2007 Thomson Inc.
Trademark Registered
Marca Registrada
Marque Deposée
www.rcaaudiovideo.com
QuickStartGuide
TH1401
www.rcaaudiovideo.com
Congratulations on purchasing your new RCA player.
Please read these instructions for quick tips on using the player.
Do not return this product to the store.
For information on new and upcoming products and to register your new
player, visit www.rcaaudiovideo.com.
Unpacking your player
Your player came with the items shown below:
• RCA Player
• Earphones
•1 x AAA battery
• Quick Start Guide (This leaflet)
• User Manual softcopy (This is stored inside your player). You may also
download the softcopy from www.rcaaudiovideo.com/downloads.
Getting started
1. Connecting the player into USB port
• Remove the USB port cover of the player.
• Connect the player into your PC USB port via built-in USB plug.
• The display shows “USB Connected”, indicating that the player is in USB
mode. The player is then automatically recognized (in ‘My Computer’) as a
removable media device.
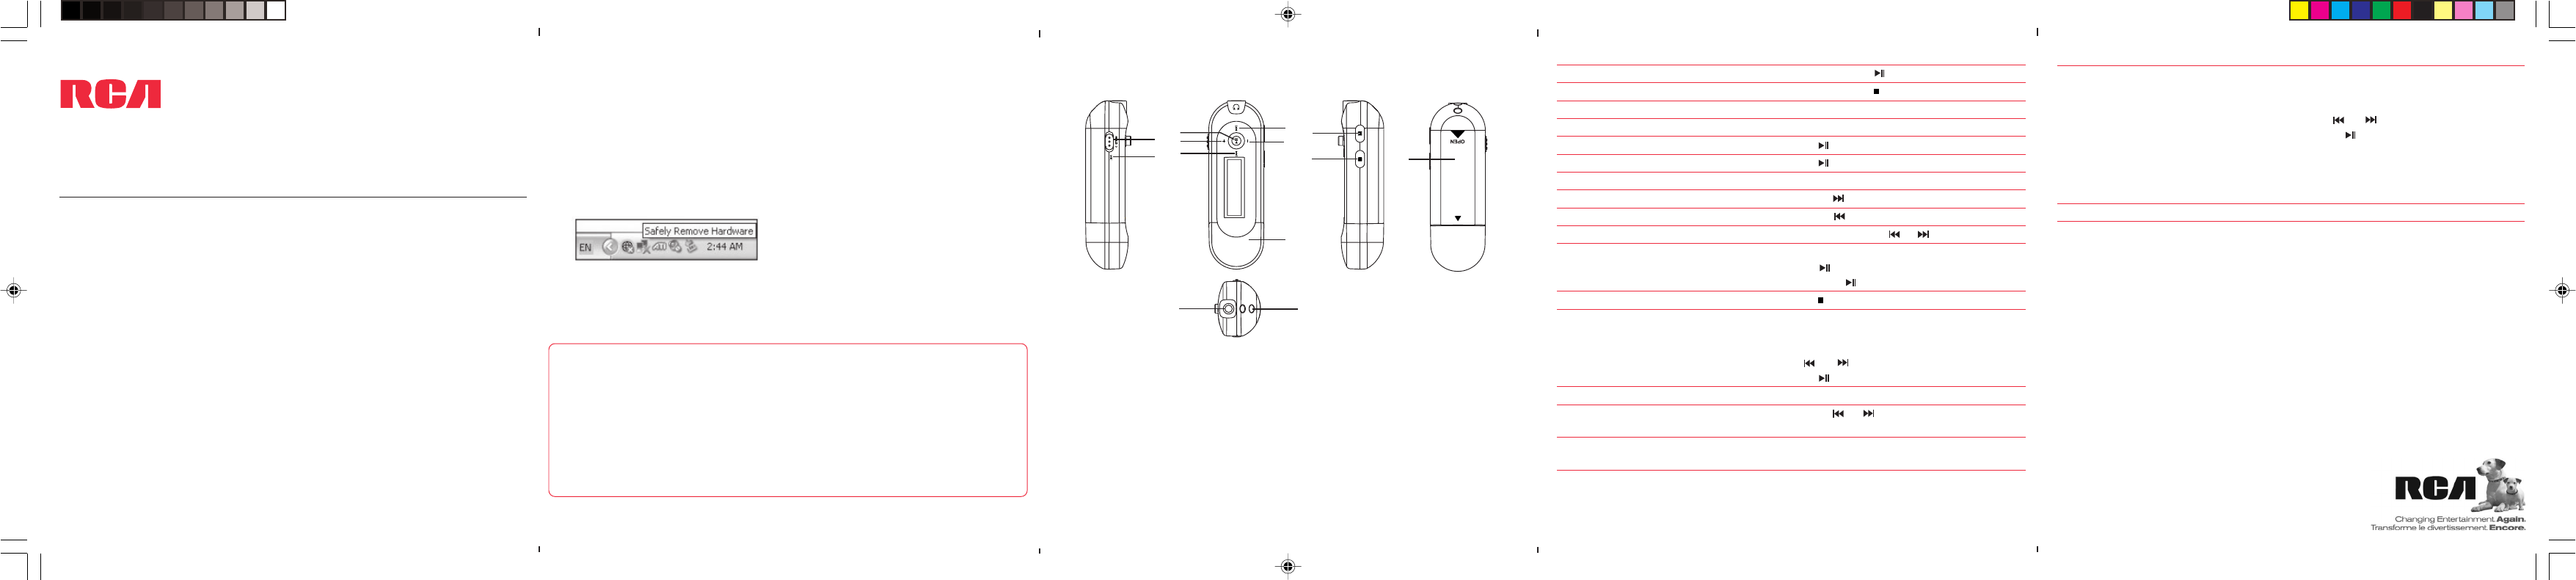
1
2
3
4
5
6
7
8
9
10
12
11
13
1. Hold Switch
2. Microphone
3. Play / Pause / Power On
4. Volume +
5. Skip backward / Fast rewind
6. Skip Next / Fast Forward
7. Volume –
8. USB Port Cover
9. Menu button
10.Stop / Power Off
11.Battery compartment
12.Headphone jack
13.Neck strap hole
Turn on the player
Turn off the player
Lock the keys
Unlock the keys
Play an audio file
Pause the playback
Adjust the volume
Skip to the next audio file
Skip to the previous audio file
Rewind or fast forward an audio file
Start voice recording
Stop voice recording
Play a voice recording file
Access the player menu
Setting the menu
Exit the setting Menu
Press and hold briefly
Press and hold briefly
Slide Hold Switch to locked position
Slide Hold Switch to unlock position
Press
Press
Slide to + or –
Slide to
Slide to
Slide and hold to or
Select Record in the Main Menu and
press to enter Record menu, select Yes
and press to start recording
Press or M
Select Voice in the Main Menu to enter
the voice mode
Select a recording to listen to by sliding
to or
Press to play the recording
Press M in music mode
Slide to or to change item or
setting
Press and hold M for a while and
release it
Navigation
Delete files from the player
*DRM music files (except subscription files) WILL play on this player.


