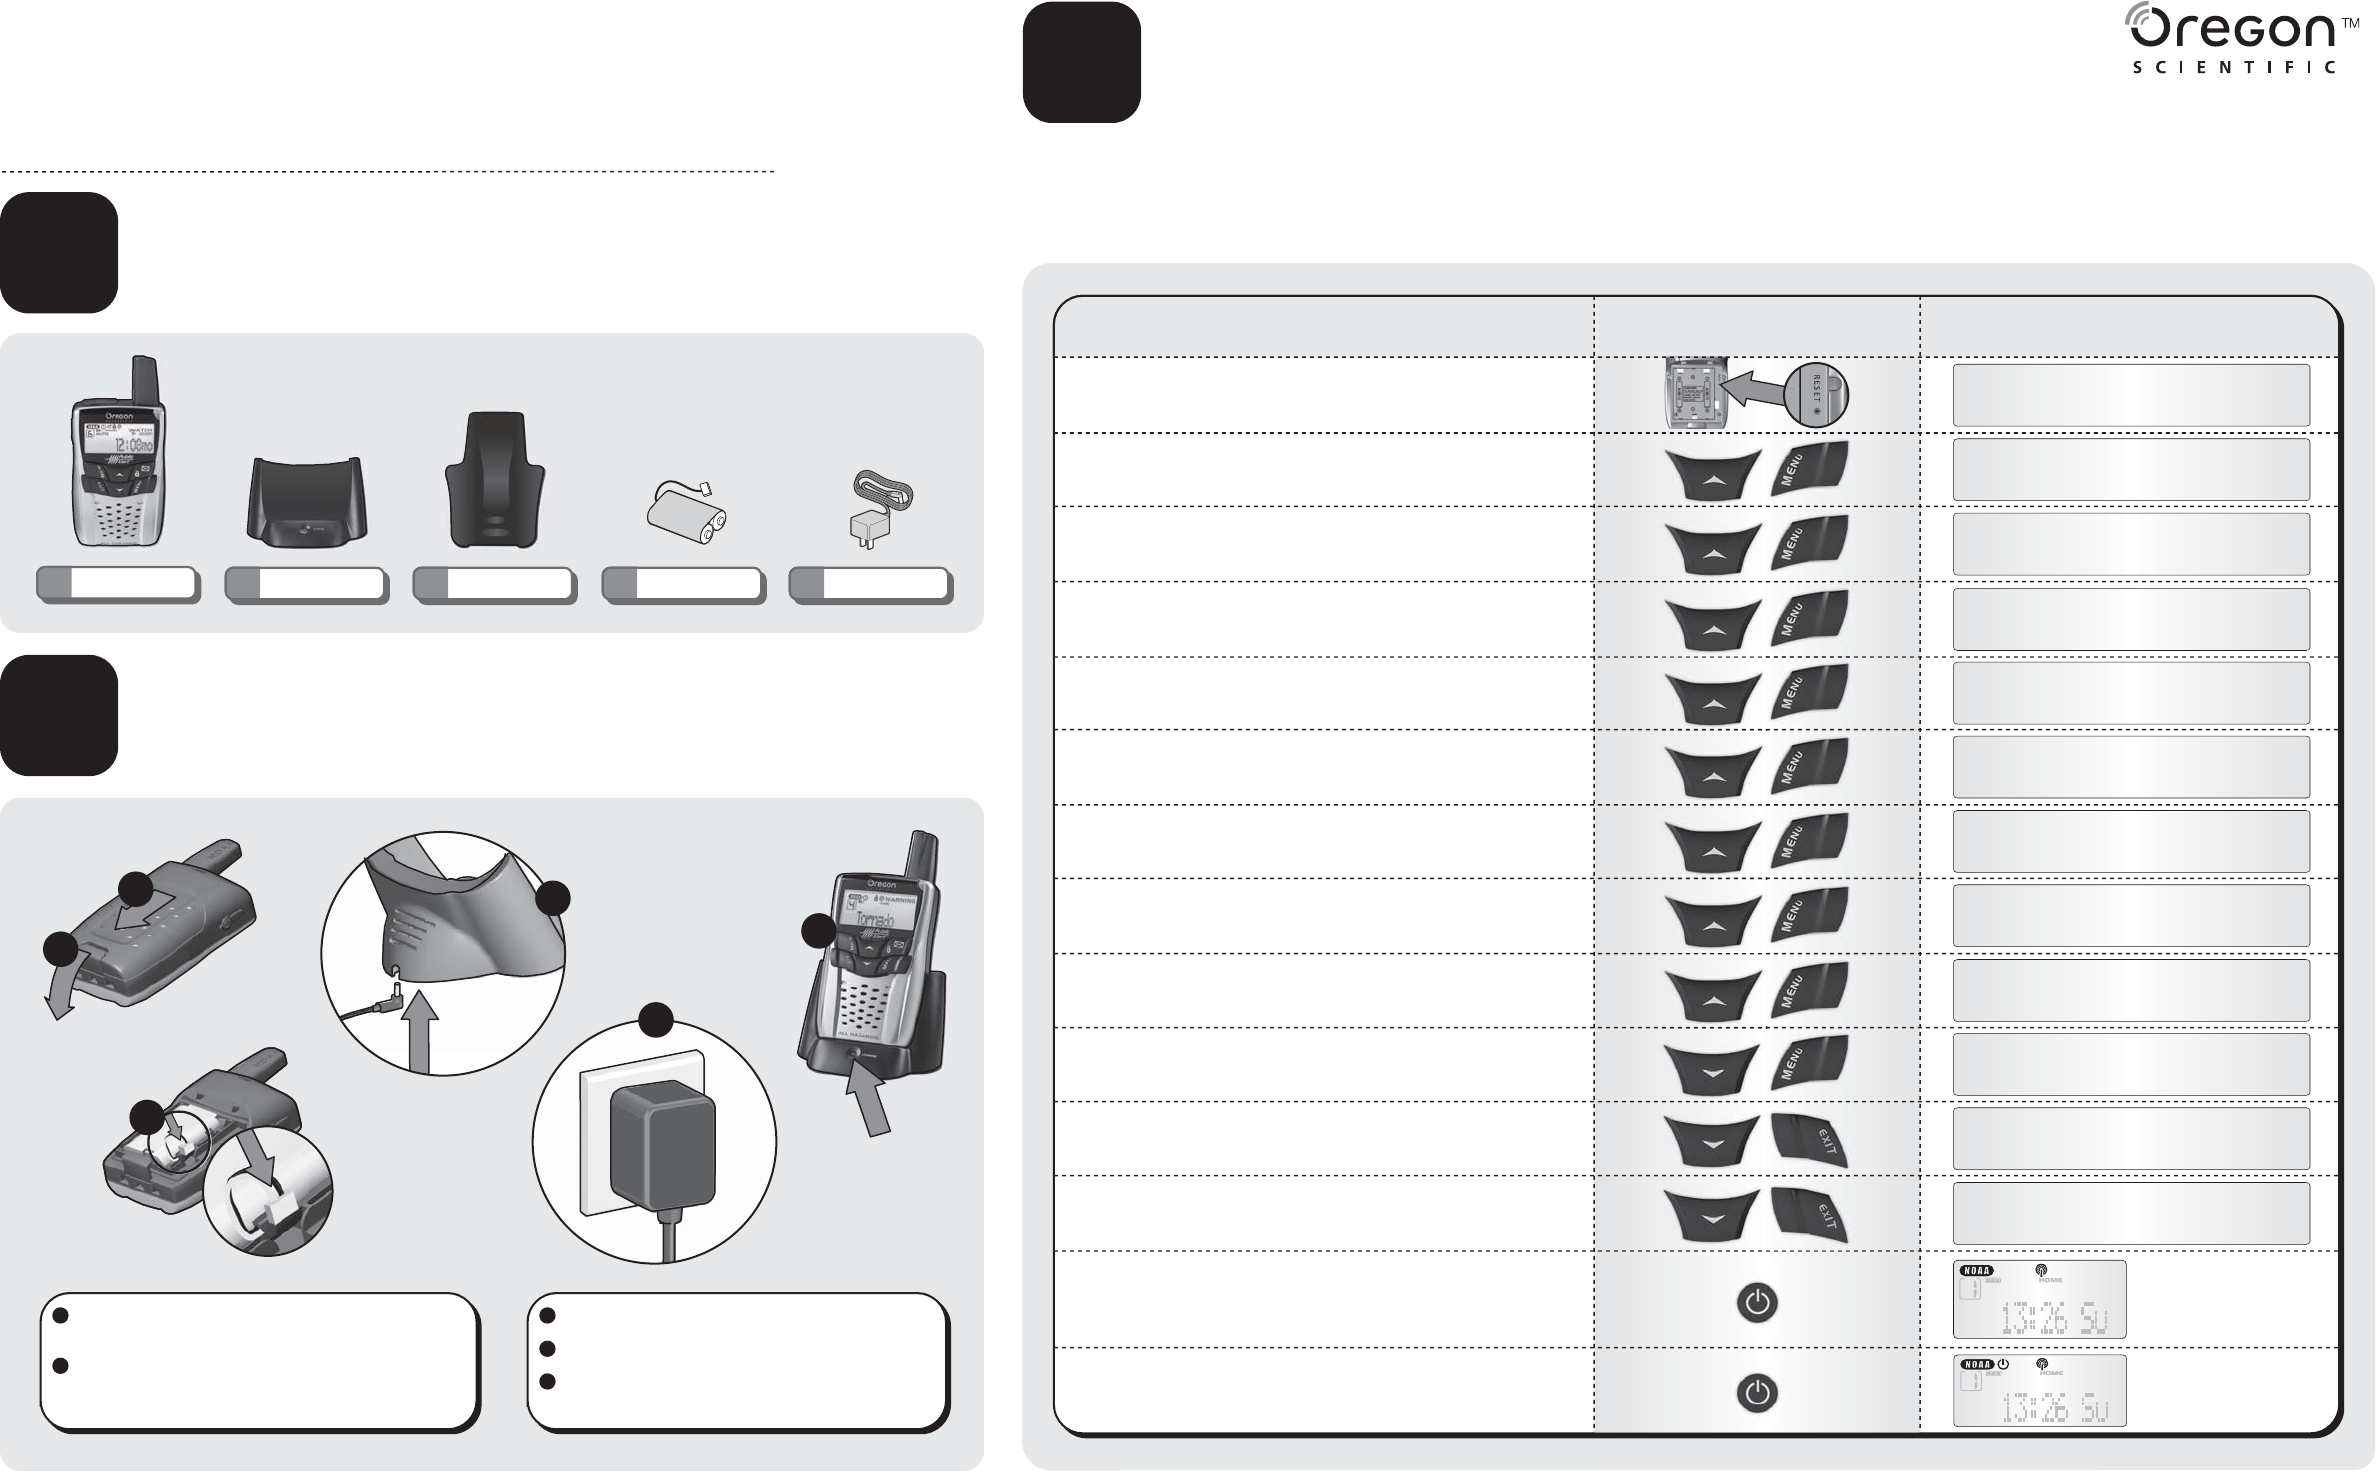
UNPACK
Make sure that you have all of the parts shown here before
setting up your Public Alert Radio.
NOTE: If you have the WRB603, the recharging cradle is replaced by the Weather Docking
Station. Please use Section C, D, and E to setup the WR602 Public Alert Radio handset.
NOTE:Make sure you complete each step in its entirety and without interruption.This is a timed process.If you do not complete
each step in order and confirm each setting within one minute, the WR602 handset will automatically exit the setup process and
go into Standby mode.If this happens, press the reset button to start the setup process again.It is essential that you complete
this setup process to ensure your unit is ready to receive all warning messages.
A
TURNING ON THE UNIT
FOR THE FIRST TIME
C
INSTALL BATTERIES
AND RECHARGE RADIO
B
QUICK START GUIDE
WR602/WRB603 PUBLIC ALERT RADIO
Public Alert Radio
1×
Recharging Cradle
1×
Belt Clip
1×
Battery pack
1×
9V Adaptor
1×
Open the battery cover on the back of the radio by pulling the
compartment lock and lifting the cover.
Insert the rechargeable battery by inserting the piece at the end
of the wire into the indentation at the bottom right of the battery
compartment.
1
Install power adaptor into the recharging cradle
Insert the AC adaptor into the wall outlet
Slide radio in recharging cradle making sure the red “charge”
light is illuminated. *It will take 6 hours to charge the batteries.
3
2
4
5
Open the battery cover and press the RESET button located on the top right
hand corner of the battery compartment.
Press the UP arrow to select 12 or 24 time format and then press the MENU
button to confirm.
Press the UP arrow to select PM/AM HOUR setting and press the MENU
button to confirm.
Press the UP arrow to select MINUTE setting and press the MENU button
to confirm.
Press the UP arrow to select month/date or day/month and press the
MENU button to confirm.
Press the UP arrow to select YEAR and press the MENU button to confirm.
Press the UP arrow to select MONTH and press the MENU button to confirm.
Press the UP arrow to select DAY and press the MENU button to confirm.
Press the UP arrow to select LANGUAGE (E=English / F=French /
S=Spanish) and press the MENU button to confirm.
Press the DOWN arrow to select “Set Channel” Mode and press MENU
to select.
Press the DOWN arrow to select "Auto" channel seeking and press the EXIT
button to confirm and press EXIT button again to get back to time mode.
If you know the specific Channel (1 through 7) that is applicable to your
location, press the UP or DOWN arrow button to select. Press the EXIT button
to confirm and press EXIT button again to get back to time mode.
Press the POWER button to switch to the NOAA ON mode. Your radio will
automatically search the appropriate channel that is in your area. Once you
hear the 24-hour weather broadcast on your radio, your radio has successfully
found the appropriate channel. If you set your channel manually, the 24-hour
weather broadcast will start immediately.
Press the POWER
button to switch to the NOAA STANDBY mode. The radio
is in Standby and will switch to ON when a NOAA alert message is received.
Instruction LCD DisplayButton(s) to Press
NOAA On
NOAA Standby
Channel:1
Channel:A
Set Channel
Lang: E/F/S
1/1/2005
1/1/2005
1/1/2005
m/d or d/m
pm 12:00
pm 12:00
12/24hr
12/24hr
2
1b
1a
3
4
5


