NOAA - S.A.M.E AM/FM
WEATHER RADIO
MODEL NO.: WR196T
USER’S MANUAL
SECTION 1: INTRODUCTION
Thank you for purchasing the WR196T NOAA (National Ocenanic Atmospheric
Administation) - SAME (Specific Area Message Encoded) Weather Radio. This
multifunctional radio warns users of severe weather and environmental dangers.
The WR196T comes with the following NOAA functions and features:
• Digital PLL tuning for seven NOAA channels
• SAME decoding and automatic alert activation
• 9 County code settings for all SAME compatible counties
Other functions and features include:
• Calendar clock with two daily alarms and eight-minute snooze
• AM/FM radio with 10 user-select channels and auto-off function
• Indoor thermometer with maximum and minimum readings
• Backlight
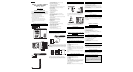
CONTROL BUTTONS AND CONNECTORS
A. [ALARM ON/OFF] BUTTON
Turns the alarm On/Off and activates/disables a county setting
B. [SNOOZE/BACKLIGHT] BUTTON
Activates the snooze function and the backlight
C. [RADIO OFF/SLEEP] BUTTON
Turns off the radio automatically when the sleep function is activated
D. [COUNTY] BUTTON
Displays and changes the county settings for SAME decoding
E. [CHANNEL] BUTTON
Changes the NOAA channels
F. [TUNING UP/DOWN] BUTTONS
Change the radio channels
G. [MODE] BUTTON
Switches between clock, calendar and the two alarm modes
H. [MEM] (MEMORY) BUTTON
Changes display of maximum, minimum and current temperatures
I. [NOAA] BUTTON
Activates the NOAA function or sets function in standby or mute modes
J. [MESSAGE] BUTTON
Displays the previously stored Alert messages
K. [AM/FM] BUTTON
Switches between AM and FM radio bandwidths
L. [PRESET] BUTTON
Changes between user-selected radio channels
M. [VOLUME UP/DOWN] BUTTONS
Adjusts radio volume; also changes values in a MODE setting
N. POWER ADAPTER CONNECTOR
Connects the AC power adapter (included)
O. ANTENNA CONNECTOR
Connects an optional external antenna (not included)
P. SPK (SPEAKER) CONNECTOR
Connects an optional external speaker (not included)
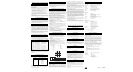
POWER
The WR196T comes with an AC power adapter. To install it, plug it into the
power adapter connector (Figure N) and a wall socket. FM reception is
enhanced when the power adapter is connnected.
Using the AC power adapter is the prefered power source. However, the WR196T
also operates on battery back-up power for emergency situations when electrical
power fails. It is recommended that batteries be installed in the WR196T at all times
for such emergency situations. The WR196T uses three AA-sized (UM3) batteries
(not included).
The WR196T has a low battery warning indicator icon. The low battery
warning icon is displayed in the top line of the LCD screen when the batteries
need changing. Change the batteries when the low-battery indicator lights up.
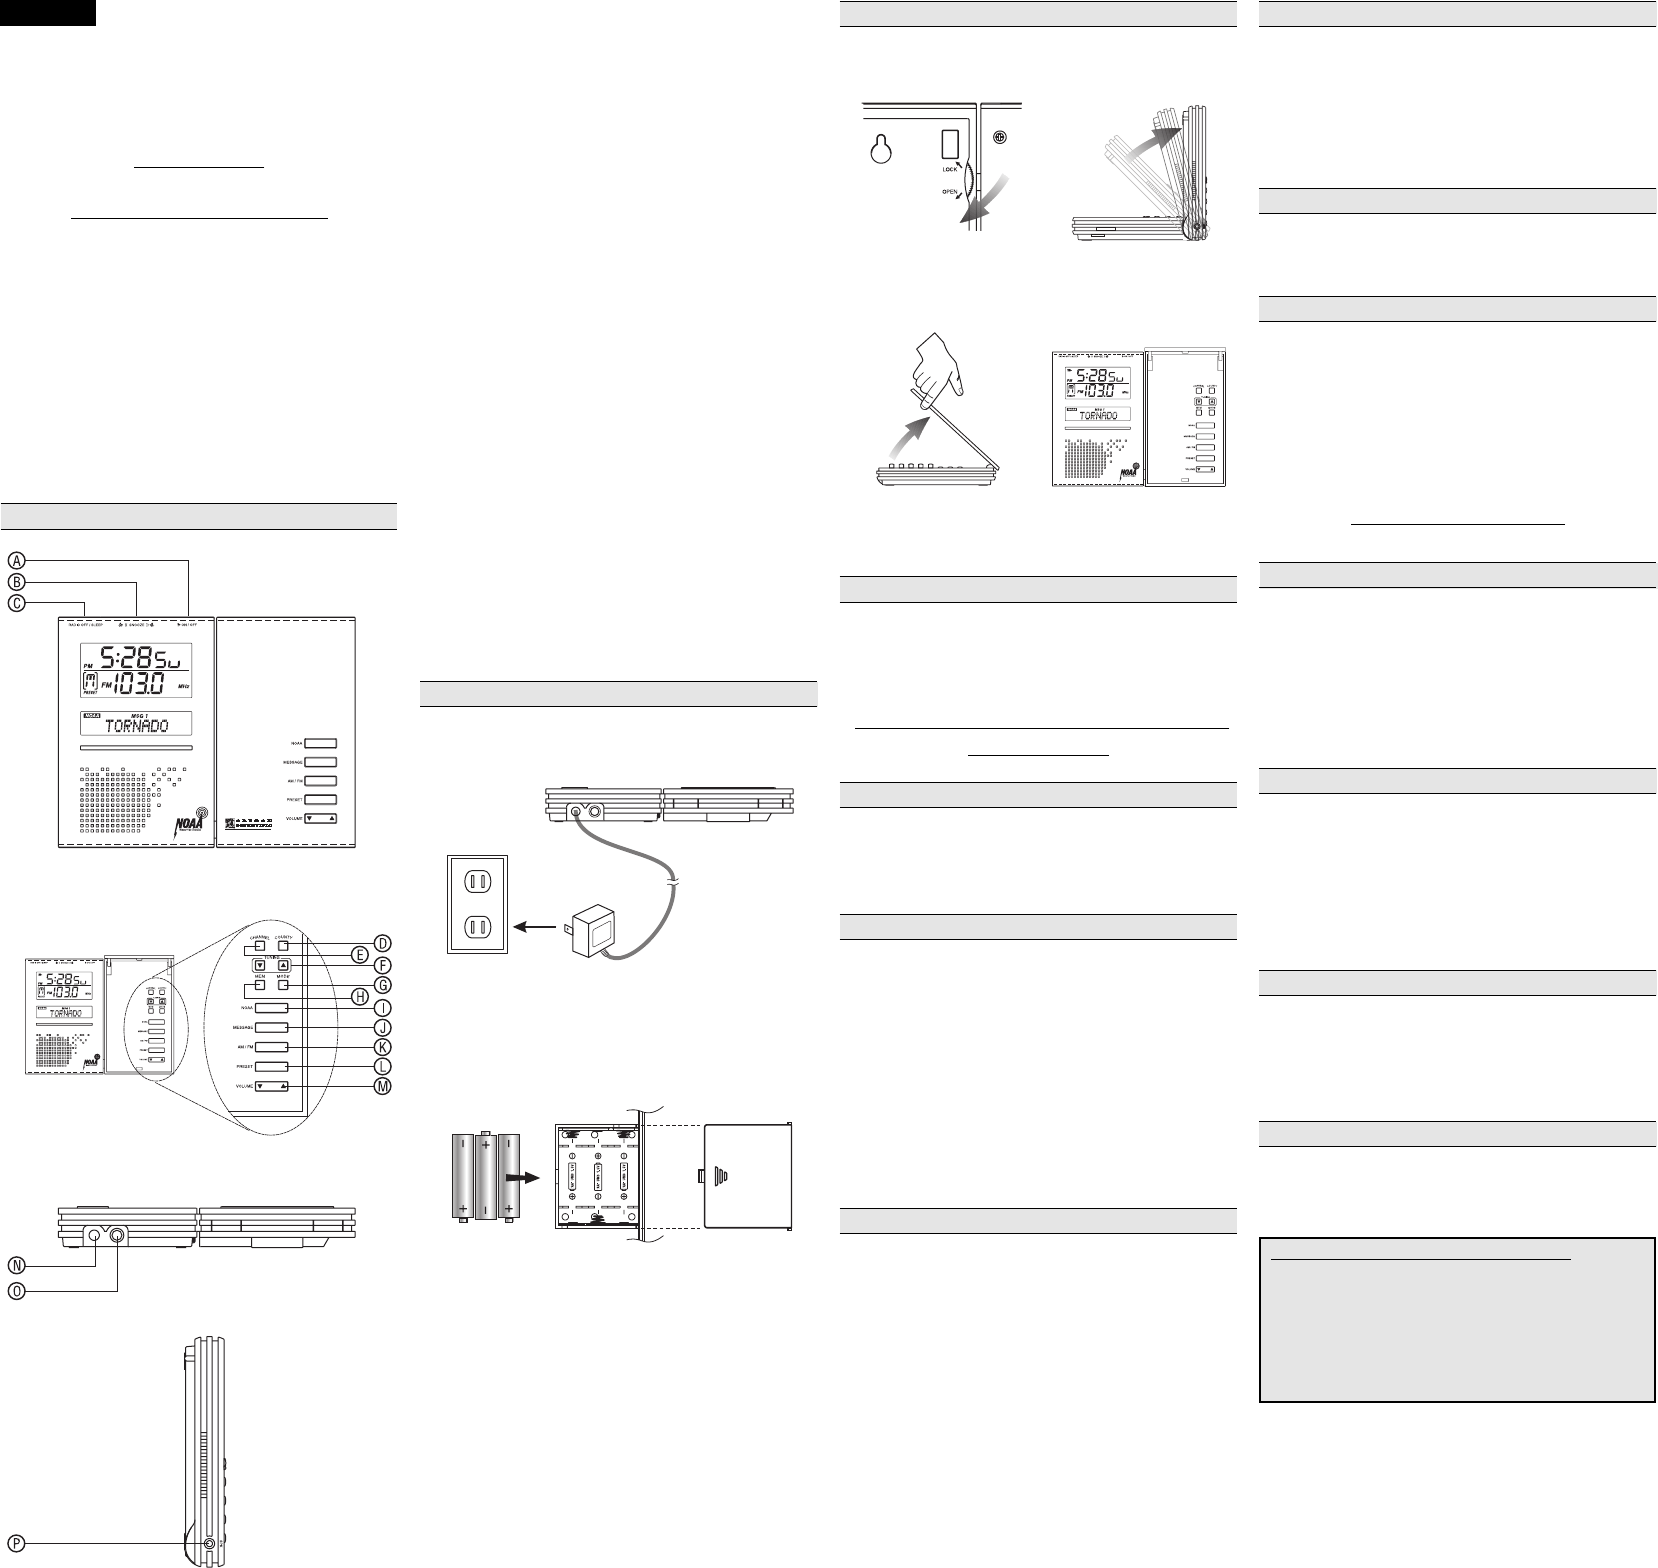
BEFORE YOU BEGIN
• Place the WR196T on a flat, sturdy surface. You can adjust the display angle
of the LCD by unlocking the latch on the back of the unit and lifting the LCD
up.
• The [CHANNEL], [COUNTY], [TUNING], [MEM] and ]MODE] buttons
are protected by a cover. Gently lift the cover to gain access to these
buttons.
• In some locations, for better NOAA reception, an optional additional antenna
(not include) may be needed. The optional attenna connection is shown in
Figure O.
THE BACKLIGHT
Press [SNOOZE/BACKLIGHT] to turn on the backlight. The light will go out
automatically after 10-seconds.
SECTION 2: THE CALENDAR CLOCK AND
THERMOMETER
DISPLAY MODES
There are four display modes: CLOCK, CALENDAR, ALARM 1 and
ALARM 2. To switch between modes, press [MODE] once to sequentially
advance through the modes. The current temperature is displayed when the AM/FM
radio is off. NOTE: The unit will save all changes and return to normal time display
automatically after 10-seconds.
HOW TO SET THE CALENDAR CLOCK
1. Press and hold [MODE] for two seconds.
2. Use [VOLUME UP/DOWN] to enter the desired hour and AM/PM
designation.
3. Press [MODE].
4. Use [VOLUME UP/DOWN] to enter the minutes.
5. Press [MODE].
6. Use [VOLUME UP/DOWN] to enter the display language for day-of-the-
week. Language choices are E (English), D (German), F (French), I (Italian)
and S (Spanish).
7. Press [MODE]. Follow the same pattern to enter the year, month and day.
8. Press [MODE] to exit.
The unit will save all changes and return to normal display automatically after
10 seconds.
HOW TO SET THE ALARMS
1. Select ALARM 1 or ALARM 2 using [MODE].
2. Press and hold [MODE] for two seconds.
3. Use [VOLUME UP/DOWN] to enter the hours.
4. Press [MODE].
5. Use [VOLUME UP/DOWN] to enter the minutes.
6. Press [MODE].
7. Use [VOLUME UP/DOWN] to select ALARM or RADIO. If ALARM is
selected, a one-minute alarm will sound at the set alarm time. If RADIO is
selected, the radio will come on at the set alarm time instead of the alarm.
The radio will remain on for an hour or until turned off.
8. Press [MODE] to exit.
The WR196T will save all changes and return to normal display automatically
after 10 seconds.
HOW TO USE THE ALARMS
To turn on or off an alarm:
1. Select ALARM 1 or ALARM 2 using [MODE].
2. Press [ALARM ON/OFF]. The alarm time is displayed when the selected
alarm is activated; otherwise, the display is blank.
Both alarms can be active or disabled at the same time. When an alarm goes off,
press [ALARM ON/OFF] to mute the alarm. Or press [SNOOZE/BACKLIGHT]
to activate the snooze function.
SNOOZE
By pressing [SNOOZE/BACKLIGHT] when the alarm sounds, the alarm will be
temporarily interrupted and sound again after 8-minutes. To disable the snooze
funtion, press [ALARM ON/OFF].
THE TEMPERATURE
When AM/FM radio is off, the current room temperature is displayed. To display
the maximum and minimum temperature in memory, press [MEM]. To clear and
reset the memory for maximum and minimum temperatures, press and hold [MEM]
for two seconds.
To display the current maximum and minimum temperatures when AM/FM radio
is on, press [MEM].
SECTION 3: THE RADIO
HOW TO USE THE RADIO
To turn on the radio, press [AM/FM]. The last selected radio channel will be shown.
To turn off the radio without using the sleep function, press and hold [RADIO OFF/
SLEEP] for two seconds or press [NOAA] twice.
To manually change the radio channel:
1. Press [AM/FM] to select AM or FM.
2. Use [TUNING UP/DOWN] to locate the desired channel.
To change the volume, use [VOLUME UP/DOWN]. Press [PRESET] to select
a programmed channel.
HOW TO PROGRAM A CHANNEL
You may program up to 10 radio channels. To program a channel:
1. Turn the radio on.
2. Select the desired channel number using [PRESET].
3. Press and hold [PRESET] for two seconds.
4. Press [AM/FM] to select AM or FM.
5. Use [TUNING UP/DOWN] to locate the desired frequency.
6. Press [PRESET] to save.
HOW TO USE THE SLEEP (AUTO-OFF) FUNCTION
1. Turn on the radio.
2 Press [RADIO OFF/SLEEP] to activate the sleep function. Blanks will be
displayed when the function is not activated.
3. Press [RADIO OFF/SLEEP] again to select the minutes before the radio
switches off automatically. You can select 15, 30, 60, 90 or 120 minutes.
NOTE ON ALARM RADIO
When the alarm radio is set [ON], it will keep playing for one hour before it turns
off automatically.
To deactivate the alarm radio: reset the time for the sleep function, or simply turn
off the radio by pressing [RADIO OFF/SLEEP] for two second or [NOAA] twice.
NOTE: Switching from AM or FM mode to NOAA mode.
When the unit is being manually tuned in AM or FM mode, the ‘M’ icon is
flashing, press either one of the following keys: [CHANNEL], [COUNTY],
[MEN], [NOAA] or [MESSAGE], there will not have any effect.
In this case, you can either wait for about 8 seconds until the ‘M’ icon stops
flashing, then you can press the [NOAA] button to change to NOAA mode.
Alternatively, you can press ‘MODE’ key to quit from the manual tuning mode.
Once the ‘M’ icon stops flashing, you can press the [NOAA] button to change
to NOAA mode.
ENGLISH