


28
206-4207
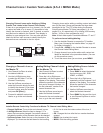
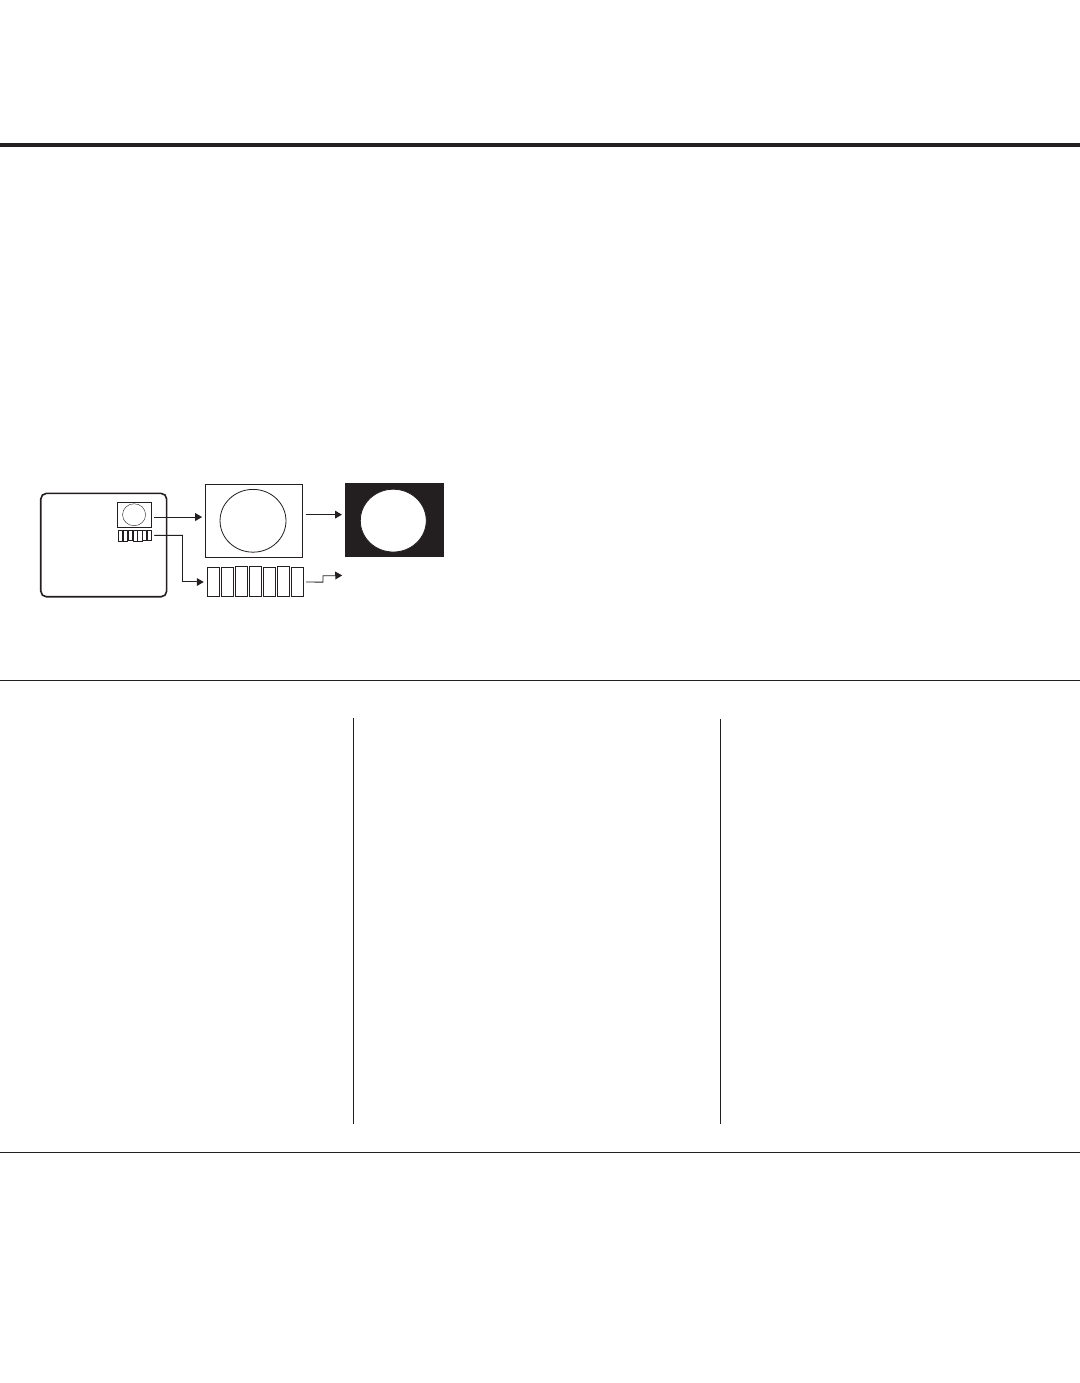
Channel Icons / Custom Text Labels (2-5-4 + MENU Mode)
Changing Channel Icons and/or Adding or Editing
Custom Text Labels in the Channel-Time Display
If there is no pre-assigned icon for a channel, you can add
a custom text label of up to seven (7) characters to help
identify the channel or network. Also, if desired, a custom
text label can be added to the Channel-Time display in
addition to a pre-assigned icon. You may also add text
labels for the Aux input sources to clearly identify the
devices that are connected to the Aux inputs.
Changing icons and/or adding or editing custom text labels
can only be done if there are channels that have been
transferred to the TV’s PTC either during the Express
Script/Custom Master TV Setup (see pages 11 to 14 or
pages 15 to 18, respectively) or by cloning (USB memory
device / .tll file or clone programmer only).
Note: A blank letter space is available between “Z” and “!”.
To perform channel editing/labeling:
1. Use the Installer Remote to access the TV Installer
Menu (see “Accessing the Installer Menu” on page 19
for further information).
2. Press 2-5-4 + MENU on the Installer Remote to access
the Channel Label Editing Menu.
3. Change channel icons and/or add or edit custom text
labels as described in the procedures below. (You can
do this more than once.)
4. To exit the menu when you are done, press MENU.
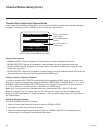
1
2
3
4
5
6
7
XYZ
XYZ
XYZ
NETWORK
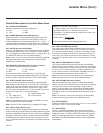
(Icon)
(Custom Text Label)
Changing a Channel’s Icon on
the Master TV
1. Use Channel Up/Down to select
the desired channel.
2. Use the Left/Right arrow keys
to select the thin letter “I” on the
Channel-Time display.
3. Use the Up/Down arrow keys to
select the icon with which you want
to identify the channel. (If you know
the icon number, enter the number,
and press OK [Enter].)
4. Proceed to add/edit custom text
labels, or go to the next channel.
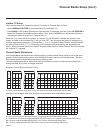
Adding/Editing Channel Labels
on the Master TV
1. Use Channel Up/Down to select
the desired channel.
2. Press the Left or Right arrow
repeatedly until the numbers 1 to 7
appear on the display. The number
shows the position of the character
that can be changed. Number 1 is
the rst character, number 2 the
second character, etc.
3. Use the Up/Down arrow keys to
select the desired character.
4. Proceed to the next number posi-
tion, or go to the next channel.
Adding/Editing Source Labels
on the Master TV
1. Press BANK to select the desired
Aux input source: AV1, RGB,
HDMI1, or HDMI2.
2. Press the Left or Right arrow
repeatedly until the numbers 0 to 9
appear on the display. The number
shows the position of the character
that can be changed.
3. Use the Up/Down arrow keys to
select the desired character.
4. Press BANK for the next Aux input,
or use Channel Up/Down to return
to channels.
• Channel Up/Down: Tunes to the next channel in scan.
• Left/Right Arrows: Select the item to change. If “I” is
shown, the icon can be changed. If a number is shown, it
indicates the position of the character that can be changed.
• Up/Down Arrows: Select the icon or the character to be
displayed. Tip: Arrows can be held down for fast scrolling.
• 0 – 9: Use to enter the index number of the icon, if
known.
• OK: Changes the icon after the icon number has been
entered.
• BANK: Use to select Aux inputs.
• MENU: Exits the editing process.
Installer Remote Control Key Functions for Master TV Channel Label Editing Menu