


26
7 SCAN
Note:
◆
The signal being received on the B-band may become
intermittent because the Priority Scan uses the B-band receiver
to check the priority channel(s) activities.
◆
When a signal is received on a Priority channel with a CTCSS or
DCS code programmed, the Priority channel is recalled even if a
different selective tone/ code is detected. However, the
transceiver only unmutes if the signal has the same CTCSS tone
or DCS code.
◆
If the Tone Alert function {page 40} is ON for the B-band, it
overrides the Priority Scan function. This means that you cannot
monitor the received signal on the Priority Channels nor transmit
on the Priority Channels.
◆
Press and hold [MONI] to pause the Priority Scan when the
transceiver is not displaying a priority channel. Release [MONI]
to resume the Priority Scan.
◆
If you clear the Priority Channels {page 16}, the Priority Scan
stops.
◆
If you press any key other than the following keys while “Pr1” or
“Pr2” is blinking, the transceiver exits the Priority Scan: [LAMP],
[MONI], [A/B], [SQL], [BAL], [F] (1 s), and [PTT].
◆
If you perform the Visual Scan {below} while Priority Scan is
activated, the Priority Scan temporarily pauses.
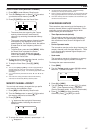
INFORMATION CHANNEL SCAN
Information Channel Scan is similar to Group Scan.
However, it scans only Information channels.
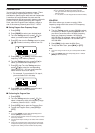
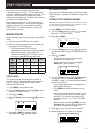
1 Press [INFO].
• The last Information channel you used is
recalled.
2 Press [INFO] (1 s) to start the Information
Channel Scan.
3 To stop the Information Channel Scan, press
[INFO].
• If necessary, press [A/B] to select the B-band
and then press [VFO] or [MR] to select another
frequency (channel) for the B-band.
Note:
The transceiver stops scanning in all modes when it detects a
signal.
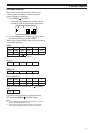
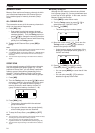
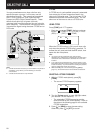
VISUAL SCAN
While you are receiving, Visual Scan allows you to
monitor frequencies near the current operating
frequency. Visual Scan graphically displays the busy
status of all frequencies in the selected range on the
other band display area. You will see 6 different bar-
graph levels, for each frequency (channel) point that
represent relative S-meter levels.
The Visual Scan monitors ±5 channels (frequencies)
by centering on the current channel (frequency). In
this way, a total of 11 channels’ (frequencies’) signal
strength status are graphically displayed.
Note:
◆
When you perform the Visual Scan on the A-band, the
transceiver can output the audio. However, when you perform
the Visual Scan on the B-band, it cannot output the audio. The
S-meter does not reflect the signal strength, neither.
◆
When the VOX function is activated, you cannot perform the
Visual Scan.
◆
When the Visual Scan is in progress, the other scan functions
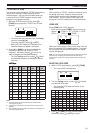
USING VISUAL SCAN (VFO)
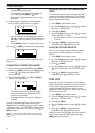
1 Select your desired band for Visual Scan.
2 Press [VFO].
3 Turn the Tuning control or press [ ]/ [ ] to select
your desired center frequency.
• The transceiver scans the 5 upper frequencies
and 5 lower frequencies using the current VFO
frequency step {page 37}.
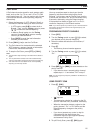
4 Press [F], [INFO] to start Visual Scan (VFO).
• The scanning frequency is displayed on the
current operating band and the relative
S-meter level of each frequency appears on
the other band display.
• To pause Scan, press and hold [MONI]. While
the Visual Scan is paused, the center
frequency bar-graph blinks and you can
monitor the frequency. Release [MONI] to
resume the Visual Scan.
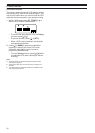
5 To change the current scanning frequency, Turn
the Tuning control or press [ ]/ [ ].
• The displayed frequency changes and the
cursor moves.
6 To stop the Visual Scan, press [F], [INFO].
Note:
◆
You can press [PTT] (or [CALL] if 1750 Hz is programmed) to
transmit during the scan if the center frequency is within the
transmission frequency range. The center bar-graph blinks while
transmitting.
◆
If the Fine Tuning function is ON, the Visual Scan cancels the
Fine Tuning function and automatically adjusts the frequency to
the next available frequency.