


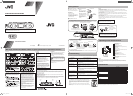
PORTABLE AUDIO SYSTEM
RA-P11BK
LVT1686-002A
[C]
©2006 Victor Company of Japan, Limited 1106NSMCREBET
Getting Started
Warning
• Store the battery in a place where children cannot reach. If a child accidentally swallows the battery,
consult a doctor immediately.
• Do not recharge, short, disassemble or heat the battery or dispose of it in a fire. Doing any of these things
may cause the battery to give off heat, crack, or start a fire.
• Do not leave the battery with other metallic materials. Doing this may cause the battery to give off heat,
crack, or start a fire.
• When throwing away or saving the battery, wrap it in tape and insulate; otherwise, the battery may start to
give off heat, crack, or start a fire.
• Do not poke the battery with tweezers or similar tools. Doing this may cause the battery to give off heat,
crack, or start a fire.
• Dispose of battery in the proper manner, according to federal, state, and local regulations.
• The batteries (battery pack or batteries installed ) shall not be exposed to excessive heat source such as
sunshine, fire or the like.
Supplied Accessories
After unpacking, check to be sure
that you have all the following items.
• Remote control
• AC adaptor
• Attachments (6 types)
• Rubber pads (A type×2, B type×2)
• CR2025 (×2) lithium coin batteries
One is loaded on the remote
control at the factory.
Prepare the Remote
Control
• When you use the remote
control for the first time, pull
out the insulation sheet.
Replacing the Battery
in the Remote Control
• Insert the battery into the
remote control by matching
the polarity (+ and –)
correctly.
Insulation sheet
Lithium
coin battery
(CR2025)
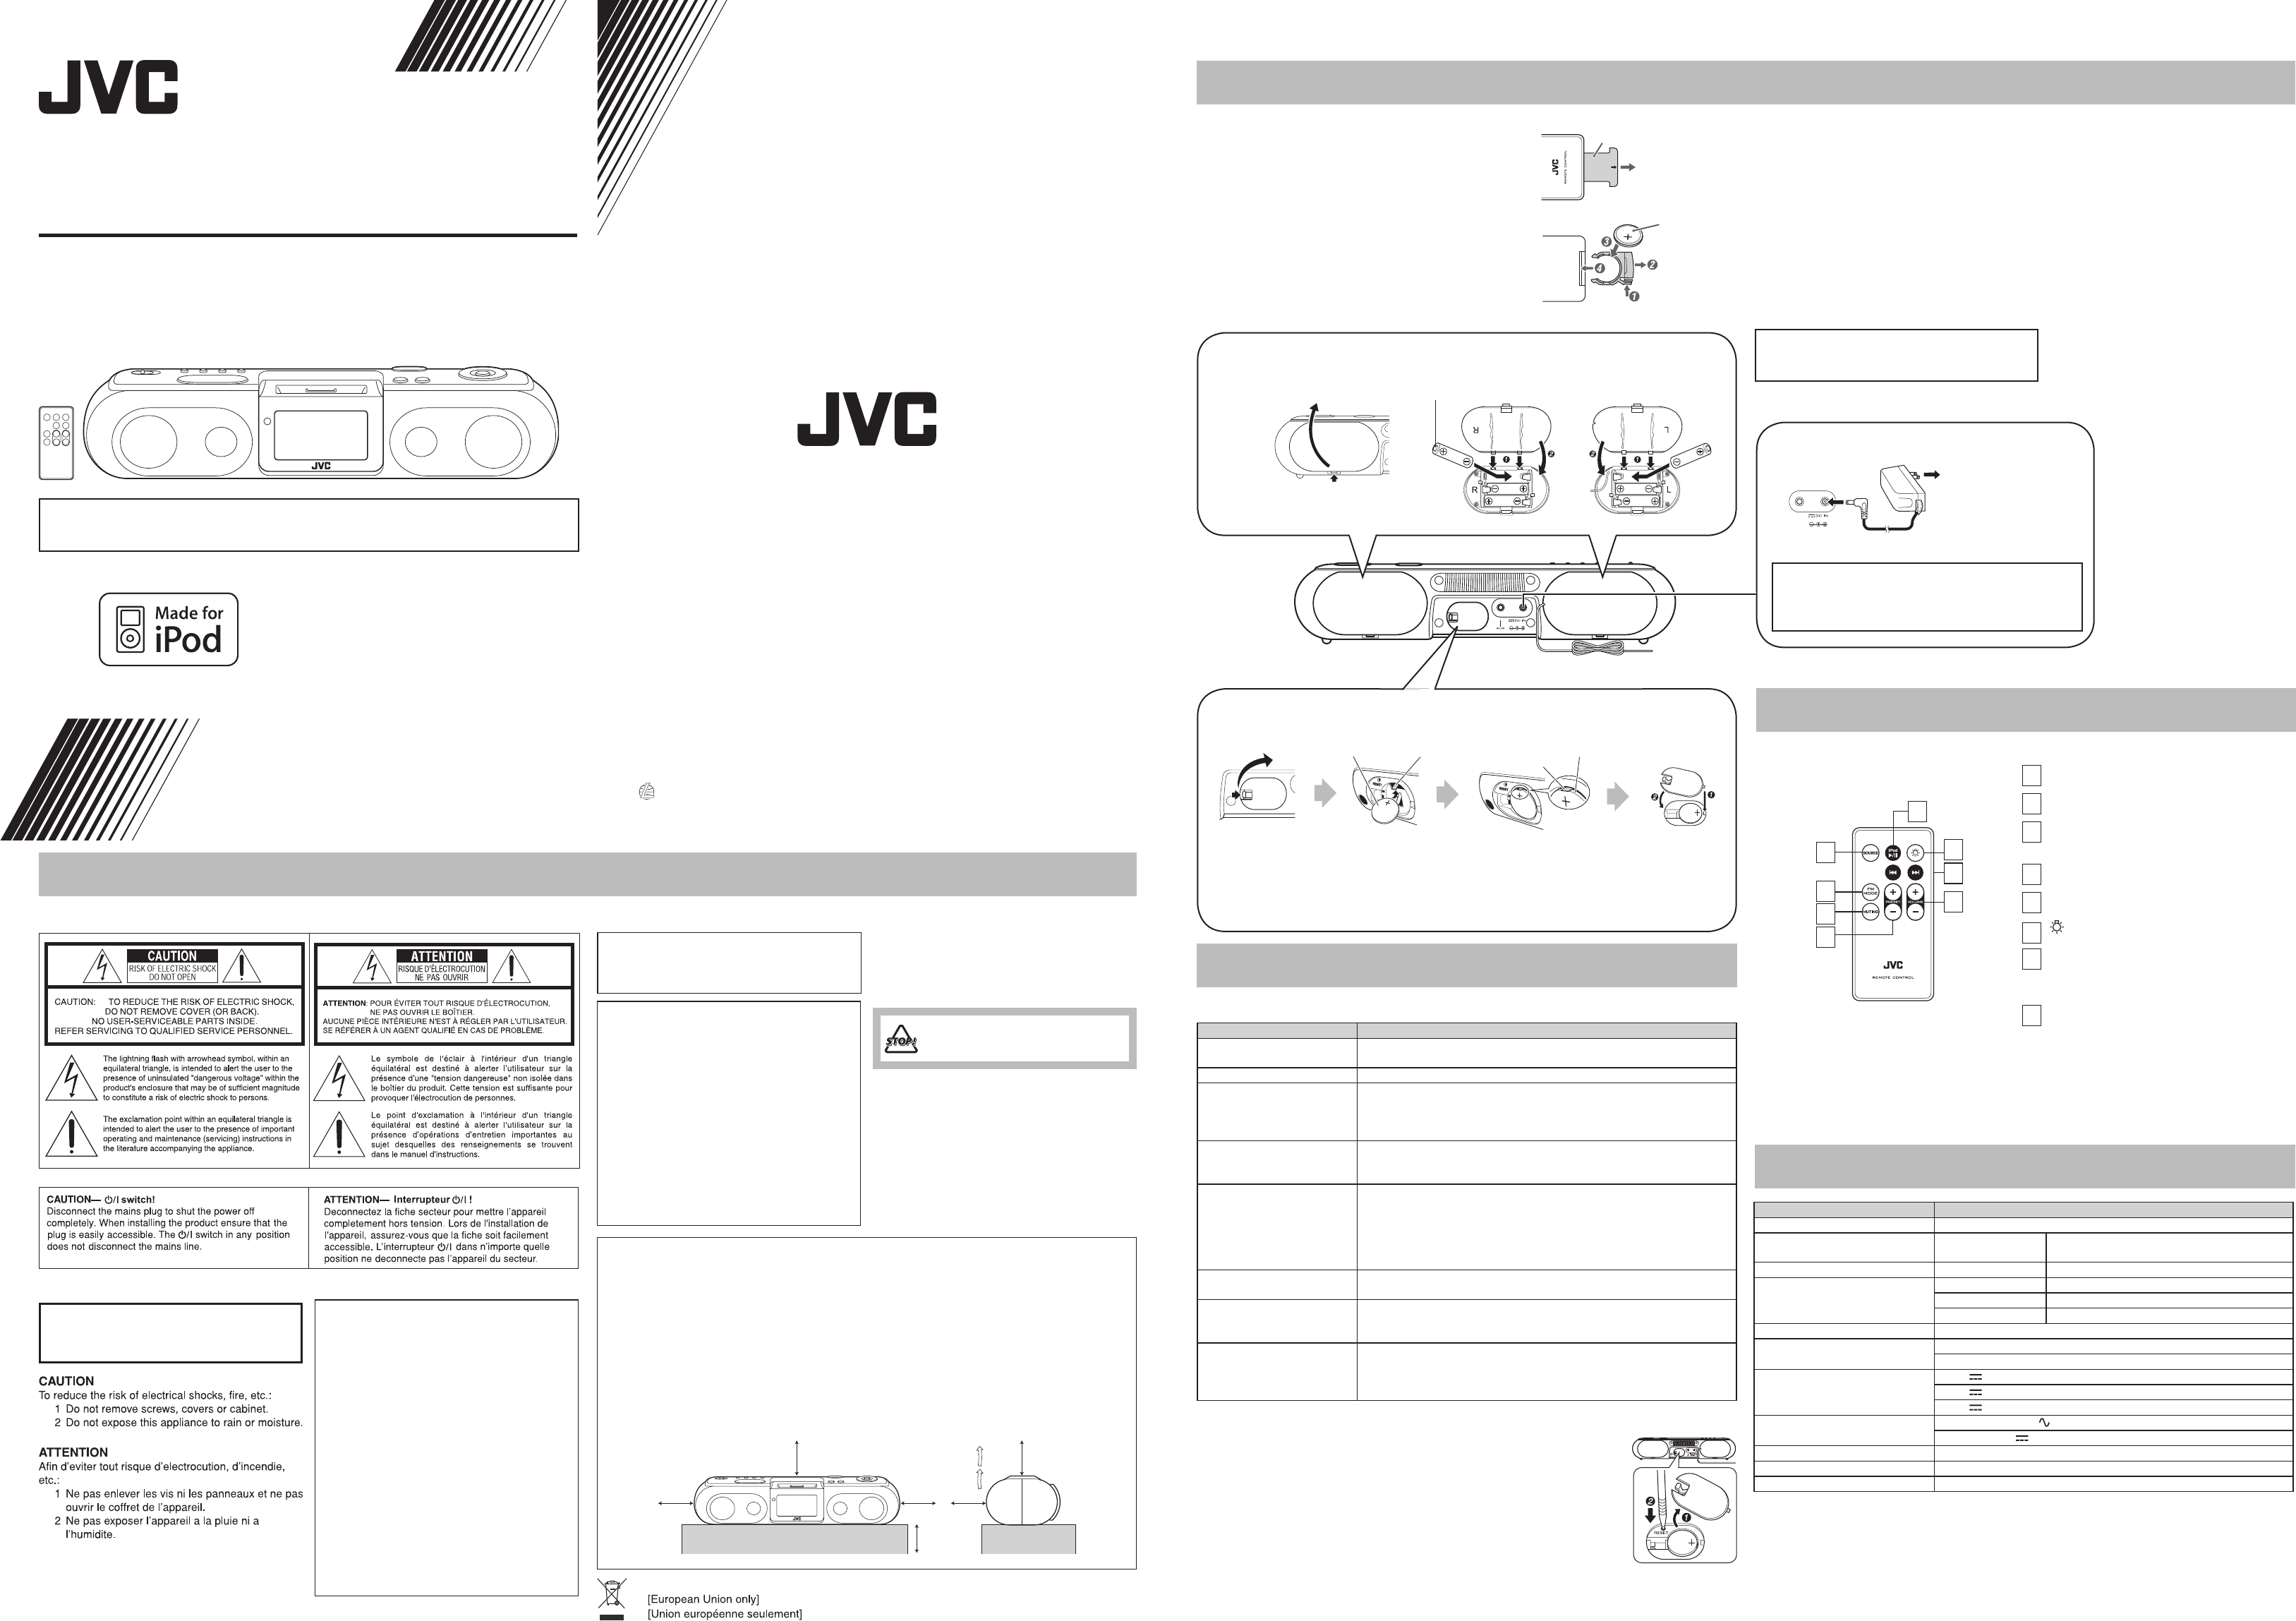
Preparation of the Unit
9V 1.5A
Loading batteries for the Clock
Be sure to match the poles (+/-) correctly.
FM wire antenna
(Pass through the notch in the cover)
1
SOURCE button
Switch the sound source.
2
FM MODE button
Switch FM stereo/monaural.
3
MUTING button
Turn off the sound. Return to original mode by
pressing again.
4
PRESET +/- button
Select a registered FM radio station (P01 to 20).
5
iPod 6 button
Play/pause the iPod.
6
button
Switch the backlight on/off.
7
4/¢ button
Fast-forward/rewind the iPod song.
Change frequencies to tune in to FM radio
station.
8
VOLUME +/- button
You can adjust the volume level from 00 to a
maximum of 20.
Troubleshooting
If you are having a problem with your System, check this list for a possible solution before calling for service.
In These Cases Check the following points
Power does not come on. • AC adaptor is not inserted securely. Plug in securely.
• The batteries are exhausted.
No longer works. Press the “RESET” button (see “Resetting the unit”).
Cannot set the iPod. • Is the selected attachment compatible to your iPod? Confirm the
compatibility of iPod and attachments in “iPod Compatibility Chart”.
• Is the attachment properly mounted on the unit? Make sure to mount the
attachment properly.
Cannot operate iPod. • Is the iPod firmly connected to the connector plug of the unit?
• Is the iPod properly functioning? Test the iPod functions in stand alone
condition.
iPod cannot be charged. • Is the iPod firmly connected to the connector plug of the unit?
•
Is the AC adaptor connected?
Make sure the AC adaptor plug is pushed in
all the way.
The iPod cannot be charged while the Unit is operated on batteries.
• For iPod 3rd Generation, set the “CHARGING SWITCH” to “FIREWIRE”
(see “Charging the iPod”).
Hard to listen to broadcasts
because of noise.
The FM antenna is not properly extended and positioned.
Unable to operate the System
from the remote control.
• The path between the remote control and the remote sensor on the
System is blocked.
• The batteries are exhausted.
When the volume level is
manually set higher than “08”,
the unit automatically lowers
the level to “08”.
The unit’s battery runs low (The “---” (Low battery) appears on the display).
Replace the batteries with new ones.
Resetting the unit
If “Troubleshooting” does not eliminate malfunctioning (failure to operate or
display properly, etc.), press the “RESET” button on the rear of the unit with
something having a sharp point, while the unit is turned on. After pressing
“RESET” button, unplug the AC adaptor and wait a while before plugging it
again.
• When using “RESET” button, make sure the lithium coin battery is loaded.
• While resetting the unit, the clock is also reset. Adjust the clock after resetting
the unit.
1
2
3
4
5
6
7
8
INSTRUCTIONS
EN
Open the battery compartment
cover by pressing the small tab.
Loading batteries for the Unit (The battery power supply)
Close the cover in the order shown by the numbers.
R6 (SUM-3)/AA (15F) (not supplied)
CAUTION:
Danger of explosion if battery is incorrectly replaced.
Replace only with the same or equivalent type.
Insert three batteries to each compartment (six batteries total). Be sure to match the poles (+/-) correctly.
While the AC adaptor is connected to the wall outlet, the unit works without batteries.
(Front side)
(Rear side)
NOTES
• Point the remote control at the remote control sensor on the front panel.
• The remote control sensor is designed to receive signals from up to approximately 7 m distance when
the remote control is pointed directly. If the remote control is pointed with an angle, the distance may
become shorter.
Thank you for purchasing a JVC product.
Please read all instructions carefully before operation, to ensure your complete understanding and to
obtain the best possible performance from the unit.
Operating on the Remote Control
9V 1.5A
AC adaptor: AA-R9031 (supplied)
To a wall outlet
Plug the AC adaptor
only after all connections
are completed.
Connecting the AC adaptor
CAUTION:
To avoid risk of fire, and to prevent damage.
•
Do not use AC adaptors except for the supplied AC adaptor.
• Do not use the supplied AC adaptor for other equipment.
Specifications
Model RA-P11BK
Type Portable audio system
Amplifier
Power Output 4W x 2
1kHz 10% THD, 6Ω
Input Sensitivity/ Impedance AUX Input 250mV/47kΩ
FM Tuner
Tuning Range 87.5MHz - 108.0MHz
Frequency Step 100kHz
Preset Stations 20
Speaker 1way full range, diameter 35mm x2
Input Terminal
External DC IN ( for AC adaptor)
AUX IN (mini jack)
Power Source
DC9V
1.5A (EXTERNAL DC IN)
DC9V (SIZE R6, AA BATTERY OR EQUIVALENT x6)
DC3V (CR2025, for the clock)
AC adaptor
Input : AC 110-240V , 50/60Hz
Output : DC 9V
1.5A
Dimensions (W x H x D) (W) 331 mm x (H) 71 mm x (D) 98 mm
Weight (Without batteries) 0.7kg
Accessory See Supplied Accessories
Specifications and appearance are subject to change without prior notice.
Lithium coin battery
(CR2025) (supplied)
Press the tab to open
the cover.
Close the cover in the order
shown by the numbers.
Plus terminal
Plus terminal
Side of the battery
Time to change the battery
As the battery is running out, the display indication dims or the alarm may beep at the time the alarm
is not set at. Replace the battery in such cases.
Insert the battery with pushing the plus
terminal up to be sure the terminal
contacts the side of the battery.
Caution: Proper Ventilation
To avoid risk of electric shock and fire, and to prevent damage, locate the apparatus as follows:
Front: No obstructions and open spacing.
Sides/ Top/ Back: No obstructions should be placed in the areas shown by the dimensions below.
Bottom: Place on the level surface. Maintain an adequate air path for ventilation by placing on a stand
with a height of 10 cm or more.
Attention: Aération correcte
Pour prévenir tout risque de décharge électrique ou d’incendie et éviter toute détérioration, installez
l’appareil de la manière suivante:
Avant: Bien dégagé de tout objet.
Côtés/dessus/dessous: Assurez-vous que rien ne bloque les espaces indiqués sur le schéma ci-dessous.
Dessous: Posez l’appareil sur une surface plane et horizontale. Veillez à ce que sa ventilation correcte
puisse se faire en le plaçant sur un support d’au moins dix centimètres de hauteur.
15cm
15cm
15cm
15cm
15cm
10cm
(For U.S.A)
CAUTION
Changes or modifications not approved by JVC
could void the user’s authority to operate the
equipment.
For Canada/pour le Canada
THIS DIGITAL APPARATUS DOES NOT
EXCEED THE CLASS B LIMITS FOR
RADIO NOISE EMISSIONS FROM DIGITAL
APPARATUS AS SET OUT IN THE
INTERFERENCE-CAUSING EQUIPMENT
STANDARD ENTITLED “DIGITAL APPARATUS,”
ICES-003 OF THE DEPARTMENT OF
COMMUNICATIONS.
CET APPAREIL NUMERIQUE RESPECTE LES
LIMITES DE BRUITS RADIOELECTRIQUES
APPLICABLES AUX APPAREILS NUMIRIQUES
DE CLASSE B PRESCRITES DANS LA NORME
SUR LE MATERIEL BROUILLEUR; “APPAREILS
NUMERIQUES”, NMB-003 EDICTEE PAR LE
MINISTRE DES COMMUNICATIONS.
Precautions
• Install in a place which is level, dry and neither too
hot nor too cold–between 5°C and 35°C.
• Install the System in a location with adequate
ventilation to prevent internal heat buildup inside
the System.
• Leave sufficient distance between the System and
the TV.
• Keep the speakers away from the TV to avoid
interference with TV.
Warnings, Cautions and Others / Mises en garde, précautions et indications diverses
(For U.S.A)
(For U.S.A)
WARNING: TO REDUCE THE RISK OF FIRE
OR ELECTRIC SHOCK, DO NOT EXPOSE
THIS APPLIANCE TO RAIN OR MOISTURE.
• Rating label is placed on the exterior of the bottom.
• L’étiquette des caractéristiques nominales se
trouve sur l’extérieur du coffret.
(For U.S.A)
This equipment has been tested and found to comply
with the limits for a Class B digital device, pursuant
to part 15 of the FCC Rules. These limits are
designed to provide reasonable protection against
harmful interference in a residential installation.
This equipment generates, uses and can radiate
radio frequency energy and, if not installed and
used in accordance with the instructions, may cause
harmful interference to radio communications.
However, there is no guarantee that interference will
not occur in a particular installation. If this equipment
does cause harmful interference to radio or television
reception, which can be determined by turning the
equipment off and on, the user is encouraged to
try to correct the interference by one or more of the
following measures:
Reorient or relocate the receiving antenna.
Increase the separation between the equipment and
receiver.
Connect the equipment into an outlet on a circuit
different from that to which the receiver is connected.
Consult the dealer or an experienced radio/TV
technician for help.
Front
Face
Side
Côté
DO NOT install the System in a location
near heat sources, or in a place subject to
direct sunlight, excessive dust or vibration.
RA-P11BK_C_EN_002A.indd 1 2006-11-14 11:23:48