


Basic Operations (VCR Plus + Recording)
35
You are ready to begin delayed recording with VCR Plus+. (When you set
up a delayed recording, you will need to select the desired channel using
the channel selector on your cable box.)
Cable with a Cable Box and Switchbox Setup
This is the right setup if you used Option 3 in the cable box hookups
covered in Advanced Operations. With that hookup you have an A-or-B
switchbox because you receive:
Some of your cable channels through a cable box (scrambled premium
channels), and
Some of your channels (unscrambled) directly through the cable
Before you begin, you need to know which cable channels you receive
through your cable box.
You also need to know the output channel for your cable box. Usually this
is either 03 or 04, but it could be 02 through 13. Consult your cable
company if you're not sure.
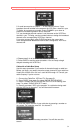
1. Press GUIDE, then press 5 to select "INITIAL SETUP MENU".
2. Press 1 to select CATV2 with the ANT/CATV1/CATV2 setting, then
press 7 to select "CABLE BOX SET" menu.
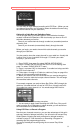
3. Press 1 to answer "NO" to the question "Is a cable box being used with
the VCR for all channels?"
4. Follow steps 1 through 4 of Cable (no cable box) Setup on page 43 to
assign all the unscrambled cable channels.
5. When you come to one of the channels that you receive through the
cable box, enter the cable box's output channel number. This will assign
the scrambled cable channels.
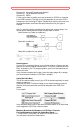
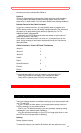
For example, suppose you receive Home Box Office (HBO) through the
cable box. Its cable channel is 2 and its VCR Plus+ channel code is 33.
Your cable box output channel is 4. You would assign HBO like this:
6. Press GUIDE to end the setup procedure.
7. You are ready to begin timed recording with VCR Plus+. But you will
need to use the A-or-B switchbox to select whether you will record from
the unscrambled or scrambled channels.
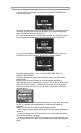
Using VCR Plus+ to Record a Program
Now that your channels are set up, you can take advantage of this quick
and easy method of delayed recording. You will use the on-screen Easy
Guide System, following the basic procedure for delayed recording
outlined on page 37. See the section on Recording a Program for
recording tips and programming priorities.
You set up the delayed recording using the on-screen Easy Guide
System.