


Getting Started (Initial Setup)
19
UHF 14-69) and 125 cable channels (CATV 1-125).
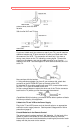
When you press 8 on the Initial Setup screen, the tuner automatically
cycles through all available channels in your area and places them in
memory. This takes 2-3 minutes. You can watch the progress on the
VCR's display - when the channel numbers stop changing, programming
is complete. Only when the power goes out for more than 24 hours do
you need to preset the channels again.
In some areas channels cannot be switched when CATV1 is selected.
Then, select CATV2 in your Initial Setup screen.
For convenience, the TV channel numbers should match those
programmed into the VCR. If your TV has automatic channel
programming, set it on the same mode - ANT, CATV1 or CATV2 - and let
it reprogram to match the VCR.
Once channels are preset, you can use the up and down CHANNEL
buttons to move through the active channels. Or you can press the
number buttons to move quickly between channels that are far apart.
Removing Channels
You may not want to keep all the stations the auto-programmer selects,
since you may prefer to have only a few favorite channels in the tuner's
memory. Or, you may want to delete from memory a weak or unused
channel that the tuner picked up.
Erased channels cannot be selected by the up and down CHANNEL
buttons but can still be selected by using the numbered buttons 0 to 9 and
100/ENT.
Adding Channels
Occasionally the auto-programming may skip an active channel because
the antenna was pointed in the wrong direction or the channel had a weak
signal or was "off the air" at the time of programming. Or you may change
your mind about a channel you removed from memory.
To Add or Erase Channels
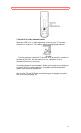
Press GUIDE, then press 5 to bring up the Initial Setup screen. Item 9
lets you add or delete channels. Use the number buttons to enter the
channel you want to change, then press STOP to delete it or press PLAY
to add it.
Choosing a Mode for Audio Playback
Choose between hi-fi and linear modes, depending on your needs.
HIFI is the preferred setting because it works for all tapes whether they
were recorded in hi-fi or linear modes. If the audio sounds distorted or
unusual or there is no audio, try the LINEAR option.
When you set the option to HIFI, hi-fi tapes will play in high fidelity, and
non-hi-fi tapes will play in linear mode.
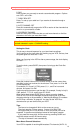
Stereo vs. Mono Sound
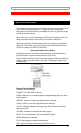
When you select the STEREO option, your VCR records in stereo any
station that broadcasts stereo sound. When a TV channel broadcasts in
stereo, you'll see a stereo indicator on the TV screen.
STEREO is the normal factory setting because it works for both stereo
and mono broadcasts. It is also necessary for recording a second audio
program (SAP).
When you select MONO, sound is recorded as mono even when a
channel broadcasts in stereo.
Use the MONO setting when the stereo signal is not strong enough for
quality reception (for example, when there is signal drift or noise).
Hi-Fi Sound
Hi-Fi sound is the same quality as that of a compact disc player. Its