


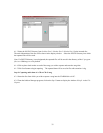
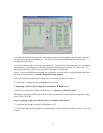

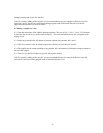

6.3.2 Select the SOURCE directory as the one in which you have saved the graphic (cdg) and audio (mp3) files.
All files in the directory will be displayed. The DESTIN directory will automatically show the song files
already stored in the JB-99.
6.3.3 Click on the files that you wish to send to the JB-99. There is a limit of 100 songs that can be transferred
at any one time. Also change or confirm the song number, title, and artist of the files you wish to send. For
each song, be sure to give the same song number for the graphic and audio files.
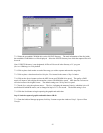
Note: You may use the Edit button to change the song number, title, and artist of a song after sending the files to
the JB-99 (For more details, see Item 9. Editing and Printing Songlist).
Note: The title and artist names will be shown in the on–screen song list as entered above.
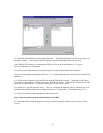
6.3.4 Click the Send button to start transferring the files to JB-99.
7. Capturing a CD or CD+G song with a recordable CD-ROM* drive
*For the list of compatible recordable CD-ROM drive, see Chapter 12. SPECIFICATION.
When using a recordable CD-ROM drive, there are only two parts (Step 2 and Step 3) to the capturing of songs
from a CD or CD+G disc.
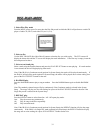
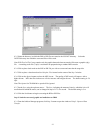
Step 2: Capturing graphic and audio data using a recordable CD-ROM drive
7.2.1 Insert the disc into the recordable CD-ROM drive in PC.
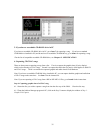
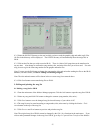
7.2.2 From the Jukebox Manager program, click on the Step 2 button to display the window of Step 2: Audio File
Capture.
41