


1
INTRODUCTION
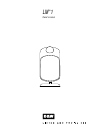
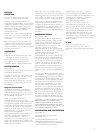
Thank you for choosing B&W.
The LM™1 provides the best possible high
fidelity sound from a small enclosure, but is also
classically elegant and innovative in style.
The LM™1 is one of the most versatile compact
speakers on the market today. Its neat shape,
flexible mounting bracket and small foot ensure
that it comfortably fits the modern lifestyle.
Please read this manual fully before unpacking
and installing the product. It will help you to
optimise its performance.
B&W maintains a network of dedicated
distributors in over 60 countries who will
be able to help you should you have any
problems your dealer cannot resolve.
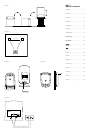
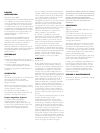
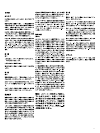
UNPACKING
(figure 1)
• Fold the carton flaps right back and invert
the carton and contents.
• Lift the carton clear of the contents.
We suggest you retain the packing for future
use.
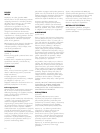
POSITIONING
(figure 2)
Position the speakers at the centre of the listening
area approximately at the corners of an
equilateral triangle.
Keep the speakers at least 1.5m apart to
maintain left-right separation.
For best results we recommend you stand the
LM™1 on a shelf or attach it to a wall.
Stray magnetic fields
The speaker drive units are magnetically shielded
such that the stray magnetic field outside
the boundaries of the cabinet, except the front,
is too low to cause distortion of the television
picture in the vast majority of cases.
There are, however, some extremely sensitive
televisions – some that even have to be adjusted
according to their alignment with the earth’s
magnetic field. If you have a problem, first de-
gauss the television set with the speaker in
place. Some have a button specially for this
purpose. If not, switch off the set at the mains for
15 minutes and switch on again. Merely putting
the set into standby mode is not sufficient.
If you still have a problem, try moving the
speaker either forwards or backwards a little to
get a more favourable juxtaposition, or space
the speaker further from the television until the
distortion disappears.
Because of the higher stray magnetic field in
front of the speaker, we recommend you keep
magnetically sensitive articles (computer discs,
audio and video tapes, swipe cards and the
like) at least 0.2m from the speaker.
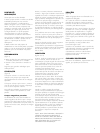
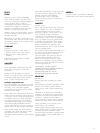
MOUNTING
(figures 3 & 4)
The LM™1 can be mounted either horizontally or
vertically, but consideration should be given to
angling the speaker either left and right or up
and down by moving the speaker relative to its
mounting base. If the speaker is mounted on a
vertical surface, we recommend that the base be
turned through 180° and positioned behind the
speaker. To do this simply click off the small
rubber-edging strip at the front of the speaker’s
base, revealing the Allen key retained beneath.
Use the Allen key to slacken the two bolts that
hold the ball in the socket joint. Reposition the
speaker relative to its base and re-tighten the two
bolts. Return the Allen key to its hidden position
for future use.
Using the template at the rear of this manual,
mark the four screw positions on the mounting
surface carefully (the two at the rear of the
base are hidden by rubber plugs. The two
at the front of the base are hidden beneath the
rubber-edging strip). Screw in the two screws
used for the top two keyhole slots, leaving
approximately 5mm (0.2 in) of the screw
protruding from the wall. Hang the speaker on
the screws and then tighten the screws. Finally
screw in the two remaining screws at the bottom
of the mounting base and refit the rubber covers.
WARNING: YOU SHOULD USE SUFFICIENT
QUALITY, SIZE AND NUMBER OF
CORROSION-PROOF FIXINGS TO AN AREA OF
WALL OF SUFFICIENT STRENGTH TO ENSURE
THAT THE SPEAKER IS SAFELY SUPPORTED.
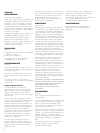
CONNECTIONS
(figure 5)
All connections should be made with the
equipment switched off.
If the speaker cable has been channelled or
routed through the mounting surface the centre
rubber plug in the base should be removed and
the cable then routed through the exposed
aperture.
Ensure the positive terminal on the speaker
(marked + and coloured red) is connected to the
positive output terminal of the amplifier and
negative (marked – and coloured black) to
negative. Incorrect connection can result in poor
imaging and loss of bass.
Always make sure all the terminal caps are
screwed down tight, as otherwise they may
rattle.
Ask your dealer for advice when choosing
cable. Keep the total impedance below the
maximum recommended in the specification and
use a low inductance cable to avoid attenuation
of the highest frequencies.
AFTERCARE
Avoid touching the drive unit diaphragms,
especially the tweeter, as damage may result.